The fight for clarity in metal isn’t about EQing mud; it’s about preserving transient integrity from the very first string pluck.
- True sonic definition comes from mechanical precision and physics, not just mix plugins.
- Every element, from string gauge to vocal support, must occupy its own architectural space in the frequency spectrum.
Recommendation: Stop ‘fixing’ your mix. Start ‘designing’ your sound for attack and separation at every single stage of the production chain.
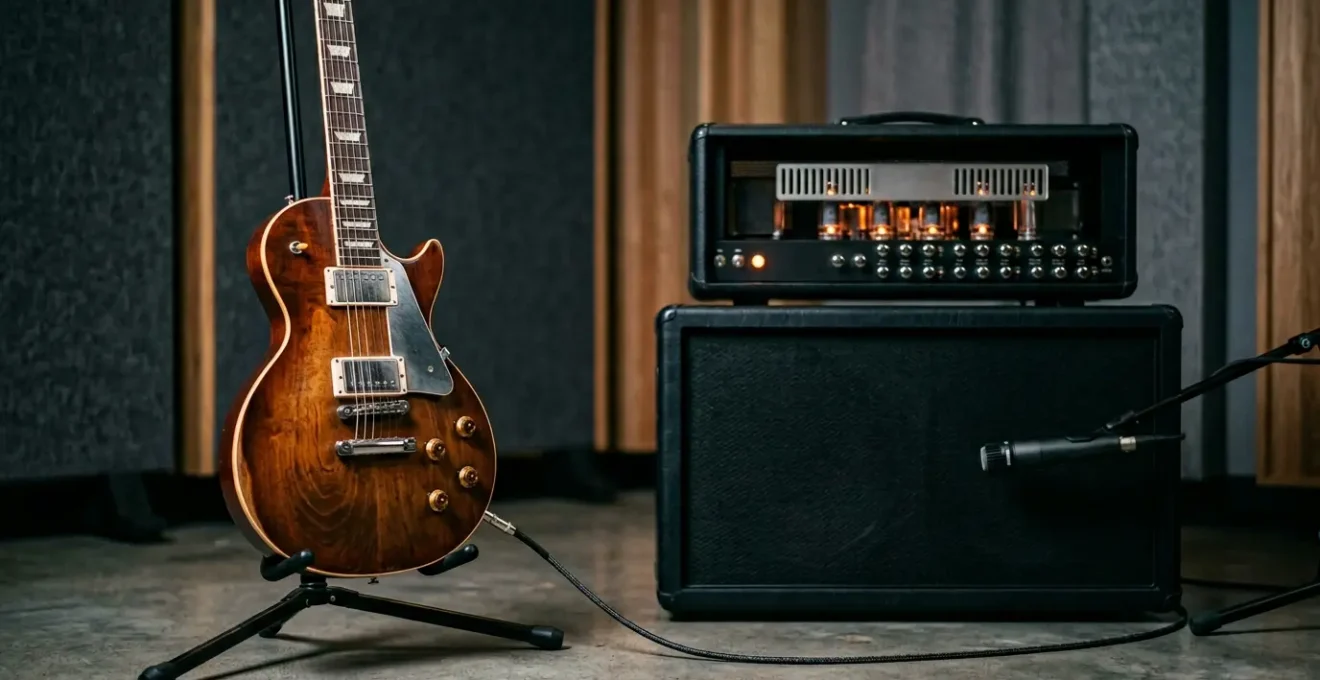
You’ve dialed in a killer high-gain tone. The amp is roaring, the distortion is saturated, and the power is undeniable. Then you hit record. In the control room, that monstrous sound collapses into a fizzy, indistinct « wall of noise. » The punch is gone, the riffs are buried, and the entire mix is swimming in mud. Every metal musician and producer knows this frustration. The common advice is to start carving out frequencies with an EQ, endlessly scooping the low-mids and fighting a battle you can’t seem to win.
This approach is fundamentally flawed. You’re treating the symptom, not the disease. The conventional wisdom of « just use a better plugin » or « cut more 300Hz » misses the point entirely. These are cleanup jobs, patching up a poorly constructed foundation. But what if the secret to a clear, powerful, and defined metal sound wasn’t about subtraction in the mix, but about precision and architecture from the absolute beginning? What if clarity isn’t something you find, but something you build?
This guide rejects the « fix it in the mix » mentality. We will dissect the entire signal chain, from the physics of the instrument itself to the final mastering choices. Forget the platitudes. We’re going to explore the architectural principles that allow brutal gain and surgical clarity to coexist. This is about building a sonic structure so solid that punch and definition are inherent, not afterthoughts. It’s time to stop cleaning up mud and start engineering a sound that never creates it in the first place.
To navigate this deep dive into sonic architecture, we’ll break down the key pillars of modern metal production. This article explores the mechanical, technical, and artistic decisions that separate an amateur wall of noise from a professional, impactful metal track.
Summary: How to Achieve High-Gain Clarity Without Losing Punch and Definition?
- Why Your Intonation Fails When Tuning Below Drop C on a Standard Scale Guitar?
- How to Build Ankle Stamina for 200 BPM Double Bass Drumming?
- Kemper or Mesa Boogie: Which Rig is Best for Touring Metal Bands in 2024?
- The Screaming Technique Mistake That Can Permanently Damage Your Vocal Cords
- Thrash, Doom, or Core: Which Metal Sub-Genre Has the Most Loyal Modern Scene?
- How to Increase Downpicking Speed for Metallica-Style Riffs Without Wrist Pain?
- Wood or Brass Snare: Which Material Cracks Best Through a Wall of Distortion?
- How to Mix Modern Hard Rock to Compete With Pop on Spotify Playlists?
Why Your Intonation Fails When Tuning Below Drop C on a Standard Scale Guitar?
Your intonation fails on a standard 25.5″ scale guitar in ultra-low tunings because you’re fighting a losing battle against physics. For a string to intonate correctly, it needs adequate tension to ensure the note you fret is the note you hear. When you tune down drastically, string tension plummets, resulting in a « floppy » string that goes sharp when fretted because the act of pressing it to the fret stretches it significantly relative to its low resting tension. It’s not a setup issue; it’s a fundamental mismatch between hardware and application.
The core of the problem lies in the scale length—the distance from the nut to the bridge. A standard scale is simply too short to maintain the necessary tension for notes below C without using unwieldy, bass-like string gauges. As a technical analysis on guitar scale research points out, a longer scale drop-tuned guitar is going to have less noticeable intonation problems than a shorter scale guitar would. This is why baritone guitars, with scale lengths of 27″ or more, are the professional standard for modern metal. The added length allows for sufficient tension at lower pitches, keeping the intonation stable across the entire fretboard.
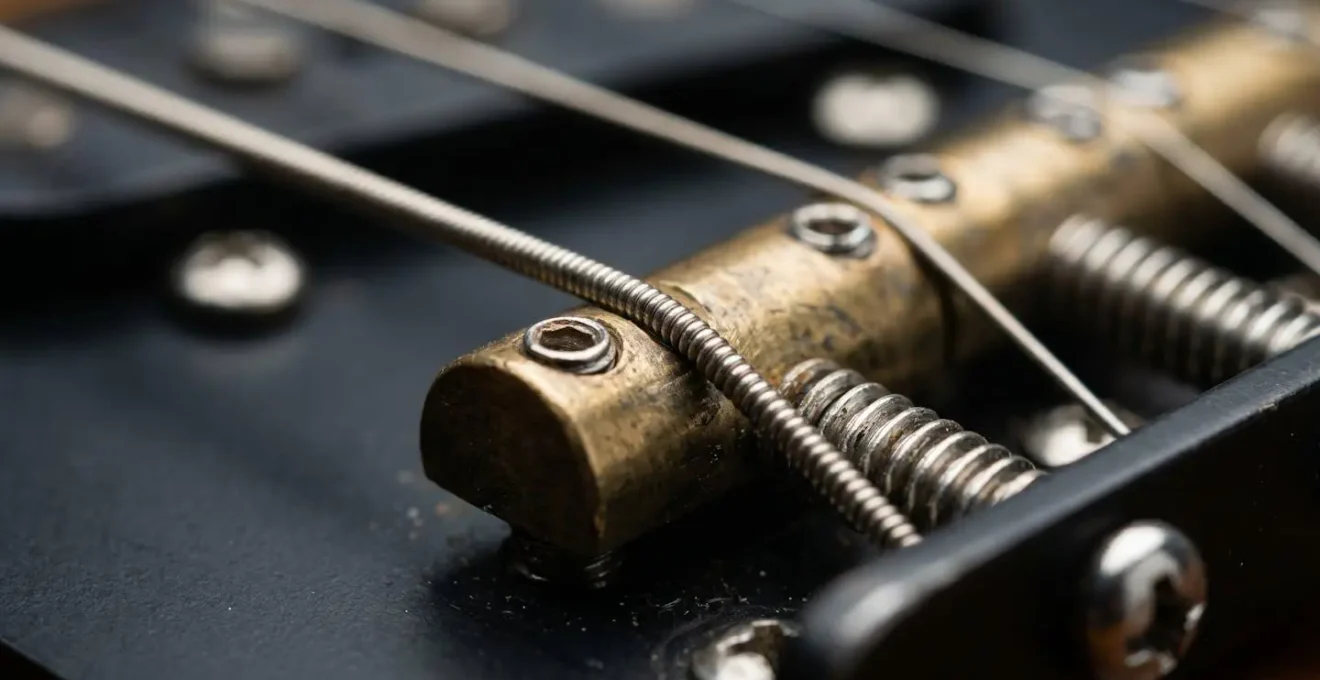
Look at your bridge saddles. When you tune down, you likely have to pull the saddles back as far as they’ll go, and it’s still not enough. This is the visual proof that you’ve exceeded the physical limits of the instrument’s design. Achieving sonic clarity starts here, at the most basic mechanical level. If the fundamental notes being played are not in tune with each other, no amount of mixing magic can fix the resulting harmonic chaos and mud. The solution isn’t a better tuner; it’s the right tool for the job: a baritone or multi-scale guitar designed for the tension demands of low tunings.
How to Build Ankle Stamina for 200 BPM Double Bass Drumming?
Building ankle stamina for 200+ BPM double bass isn’t about leg strength; it’s about muscular efficiency and re-training your body to use smaller, faster muscle groups. Brute-forcing it with your entire leg (quads and hips) is a recipe for fatigue and a hard speed ceiling around 180 BPM. The key is a progressive transition from large, powerful leg motions to precise, isolated ankle movements.
This method is about economy of motion. As extreme metal drummer Helly states in an interview, « the faster you want to go, the smaller the movements of the leg, foot and ankle, and the smaller the muscle groups must be. » To achieve this, you need to master specific techniques in stages. Start with a solid heel-up technique for consistency at moderate tempos (160-180 BPM). This builds your foundation. To break the 200 BPM barrier and beyond, you must transition to a swivel technique or other ankle-focused methods. This involves using the ankle and toes to « flick » the pedal, with the foot barely leaving the footboard and minimal motion coming from the knee.
To implement this, you must train your brain and your muscles to connect. One of the most effective methods, according to an in-depth guide on extreme double bass, involves mic’ing your bass drum and using in-ear monitors with a high EQ boost. This allows you to hear the precise attack of every single stroke. You’ll instantly identify inconsistencies in timing and volume that are inaudible acoustically. Combine this auditory feedback with interval training: practice in short, high-intensity bursts at your maximum speed, followed by recovery periods at a relaxed tempo. This trains the fast-twitch muscle fibers in your ankles without burning out.
Kemper or Mesa Boogie: Which Rig is Best for Touring Metal Bands in 2024?
For a touring metal band in 2024, the choice between a Kemper Profiler and a traditional Mesa Boogie tube amp isn’t a question of which sounds better, but which is the superior logistical tool. For nearly all touring applications, the Kemper is the decisively better choice. The debate over digital vs. tube tone is largely irrelevant to the 99% of the audience who cannot distinguish between a mic’d cabinet and a direct profile in a dense, live metal mix. The practical advantages of a digital rig, however, are monumental.
The primary factors are weight, consistency, and reliability. A Kemper rack unit weighs around 20 pounds and fits in a small flight case. A Mesa Boogie Dual Rectifier head and a 4×12 cabinet can easily exceed 100 pounds, requiring multiple, oversized flight cases and significantly increasing freight costs and load-in effort. Furthermore, a Kemper delivers the exact same profiled tone every single night, regardless of venue acoustics or stage volume. A tube amp’s tone, however, is susceptible to variations in power, room acoustics, and microphone placement by the front-of-house engineer.
The following table, based on extensive discussions and analysis from veteran touring musicians, breaks down the practical realities of a digital vs. tube workflow on the road. As an analysis from a gear-focused community shows, the logistical benefits of digital modeling are overwhelming for professional touring.
| Factor | Kemper Profiler | Mesa Boogie (Tube Amp) |
|---|---|---|
| Transportation Weight | Lightweight (rack unit ~20 lbs) | Heavy (head + cabinet 80-120 lbs) |
| Flight Case Requirements | Minimal – rack or small case | Large cases for head and cab |
| Tube Maintenance Cost | Zero – solid state | $200-400 annually for retubing |
| FOH Setup Time | Seconds (direct XLR out) | 5-15 minutes (mic placement, phase) |
| Venue Consistency | Identical tone every venue | Varies by room acoustics, stage volume |
| Failure Risk Points | Single digital unit | Tubes, transformer, speaker cones |
| Sonic Flexibility | Unlimited profiles – multiple tones per song | Single signature tone (requires amp swap) |
| Audience Perception (Live Mix) | Indistinguishable from real amp in full band context | Authentic tube response (mostly inaudible difference to 99% of audience) |
Ultimately, the romance of a glowing wall of tube amps is a luxury few professional touring bands can afford. The Kemper offers a more reliable, consistent, and cost-effective solution that allows the band to focus on their performance, not on troubleshooting their gear. For studio recording, the choice is artistic. For the road, it’s a matter of professional logistics, and digital wins.
The Screaming Technique Mistake That Can Permanently Damage Your Vocal Cords
The single most dangerous mistake in screaming is believing the sound comes from your throat. True, sustainable extreme vocals are a full-body athletic endeavor powered by diaphragmatic support, not a feat of laryngeal abuse. Attempting to generate distortion and volume by simply « yelling » or tensing your throat will inevitably lead to vocal strain, nodules, polyps, and potentially permanent damage.
As a deep dive into vocal techniques explains, « Many metal singers think that it’s all about yelling or screaming. That’s actually not the case unless you want permanent damage to your voice. » The sound you perceive as a « scream » is actually a controlled, supported column of air resonating with the false vocal folds (ventricular folds), which are located above the true vocal cords. Proper technique uses these robust false folds to create distortion, leaving the delicate true vocal cords to simply handle the pitch, or in some techniques, to vibrate freely without the strain of producing the raw sound.
Case Study: The Clinical Cost of Improper Technique
The consequences of poor technique are not theoretical. In a well-documented series of cases, medical professionals observed a direct link between improper methods and physical injury. According to clinical evidence of vocal damage from improper growling, Radboud University Nijmegen Medical Centre in the Netherlands reported on multiple patients who developed edema and polyps on their vocal folds. These injuries were directly attributed to the rising popularity of extreme vocal styles performed without proper training, leading to a measurable increase in preventable vocal damage.

Engaging your diaphragm is the non-negotiable first step. The power must originate from your core, creating a steady, high-pressure stream of air. This air is then shaped and distorted higher up, without constricting the throat. Ignoring this principle is not a matter of stylistic choice; it’s a gamble with your physical health and career longevity. A damaged voice can silence a musician permanently, making this the most critical piece of technique to master in the entire metal genre.
Thrash, Doom, or Core: Which Metal Sub-Genre Has the Most Loyal Modern Scene?
Defining « loyalty » in a modern music scene is complex, but if loyalty is measured by stylistic adherence, inter-generational dedication, and resistance to mainstream trends, then Doom Metal possesses the most loyal modern scene. While Thrash has a legacy fanbase and various « -core » genres have passionate, youthful followings, the Doom scene operates with a unique, almost religious devotion to its sonic and aesthetic tenets.
Thrash Metal’s loyalty is often tied to nostalgia for the « Big Four » and the glory days of the 80s. While new thrash bands exist, the scene’s gravity is centered on its founding fathers. The « -core » scenes (Metalcore, Deathcore) are incredibly vibrant and energetic but are also characterized by rapid evolution and stylistic cross-pollination. A band that is huge one year can feel dated three years later as the scene’s sound shifts. This constant mutation, while exciting, is the opposite of the long-term stability that defines loyalty.
Doom Metal, by contrast, is defined by its patience and unwavering commitment to a core sound: slow tempos, down-tuned, heavily distorted guitars, and themes of despair or the occult. A new doom band in 2024 can sound remarkably similar to a band from 1994 or even 1974 (Black Sabbath), and this is seen as a feature, not a flaw. The loyalty is to the feeling and atmosphere the genre creates, not to a specific band or a fleeting trend. Fans are « lifers, » and the scene supports itself through a global network of small labels, festivals (like Roadburn), and dedicated zines. This architectural stability, built on a shared sonic philosophy rather than personality, gives Doom its unparalleled staying power and fan loyalty.
How to Increase Downpicking Speed for Metallica-Style Riffs Without Wrist Pain?
Increasing your downpicking speed for relentless, Metallica-style riffs is not about building more muscle or « powering through » the pain. It is an engineering problem. The solution lies in a radical focus on economy of motion and eliminating every source of unnecessary friction and tension. Wrist pain is a signal that your technique is inefficient and actively working against you.
The first and most critical adjustment is your pick attack. Most players dig the pick too deep into the strings, creating massive drag that requires more force to overcome, leading to fatigue and strain. The goal is to use the absolute minimum pick surface necessary. As confirmed by detailed guitar technique analysis, using only its very tip can reduce drag and increase speed by over 20% without added effort. This single change reduces the energy required for each stroke, allowing for higher speeds over longer periods. Your pick should glide over the string, not fight through it.
This principle of efficiency extends to your entire picking hand. The motion should not originate from your wrist alone. Instead, it should be a coordinated movement involving subtle forearm rotation—like turning a doorknob. This distributes the effort across larger, more resilient muscle groups, taking the strain off the delicate tendons in your wrist. Establishing a light anchor point with your palm or pinky on the bridge can provide stability, but it must be a relaxed contact, not a tense pivot point.
Your Action Plan: Economy of Motion Checklist for Pain-Free Downpicking
- Verify pick angle: Ensure a slight tilt (not perpendicular) to the strings to minimize resistance.
- Reduce pick depth: Use only the very tip, limiting string contact to a maximum of 2-3mm.
- Establish a light anchor point: Lightly rest the edge of your palm on the bridge for stability without adding tension.
- Introduce forearm rotation: Incorporate a subtle « doorknob-turning » motion from the elbow, not just isolated wrist flexion.
- Practice tension-release cycles: Stay completely relaxed until the moment of string impact, then immediately release all tension.
By systematically auditing and refining your mechanics with a focus on reducing drag and wasted energy, you transform downpicking from a feat of brute strength into a precise, efficient technique. This is how players like James Hetfield maintain speed and consistency for hours on end—it is a marathon of efficiency, not a sprint of force.
Wood or Brass Snare: Which Material Cracks Best Through a Wall of Distortion?
In the context of a dense, high-gain metal mix, a brass snare is the superior tool for cutting through the wall of distortion. While wood snares offer warmth and body, these are the very frequencies that are already oversaturated by down-tuned guitars and bass. A brass snare’s inherent sonic properties—a sharp, metallic attack and a rich upper-midrange projection—are precisely what’s needed to occupy a distinct frequency space and maintain transient clarity.
Think of it as sonic architecture. The « wall of sound » created by distorted guitars is a thick, complex structure occupying a massive swath of the frequency spectrum, particularly from 200 Hz to 5 kHz. A wood snare (especially maple or birch) has its fundamental tone and warmth squarely in the low-mids (200-500 Hz), forcing it to compete directly with the guitars. This results in « harmonic crowding, » where both elements fight for the same space, and the snare’s impact gets lost. To make a wood snare audible, a producer often has to aggressively EQ it, thinning it out and sacrificing its natural character.
A brass snare, on the other hand, is built to slice through this. Its primary character lives higher in the frequency spectrum. The initial « crack » has a strong transient in the 5-8 kHz range, a region above the meatiest part of the guitar tone. Its fundamental ring and overtones are focused in the 1-3 kHz upper-midrange, giving it a powerful « voice » that can be heard clearly without extensive processing. This allows the snare to sit on top of the guitar mix, providing a clear, consistent backbeat that drives the song forward. The brass snare doesn’t fight the guitars; it claims its own territory, making the entire mix sound bigger and more defined.
Key Takeaways
- Clarity is an architectural choice, not a mixing fix. It begins with mechanical precision at the source.
- Economy of motion is the key to speed and endurance, whether in picking or drumming. Efficiency trumps brute force.
- Every sound in your mix needs its own frequency « space. » Avoid harmonic crowding by making deliberate timbral choices from the start.
How to Mix Modern Hard Rock to Compete With Pop on Spotify Playlists?
To make a modern hard rock mix compete with pop on Spotify, you must abandon the traditional rock mixing mindset and adopt the sonic architecture of pop production. This does not mean sacrificing power or aggression. It means ruthlessly prioritizing vocal clarity, transient punch, and mid-range translation above all else. Pop mixes dominate playlists because they are surgically engineered to sound impactful on any device, from a high-end club system to a cheap laptop speaker. Rock mixes often fail this test.
The first rule is that the vocal is king. In a pop mix, the lead vocal is the undeniable center of the universe, with all other instruments arranged around it. In many rock mixes, the vocal fights for space with distorted guitars. To compete, you must create a dedicated « pocket » for the vocal in the center of the mix. This often means carving out more space from the rhythm guitars in the 1-4kHz range than you might be comfortable with. Use dynamic EQ on the guitars that only ducks these frequencies when the vocalist is singing. The vocal must be intelligible and present at all times.
Secondly, you must re-evaluate your low end. Pop’s perceived « power » comes from a clean, focused sub-bass (often from an 808 or synth bass) and a punchy kick drum, not a booming, muddy low-end from the bass guitar. Your kick and snare transients are your most valuable assets. Use transient shapers and parallel compression to make the initial « hit » of the drum slice through the mix, even at low volumes. The bass guitar’s role is often to provide harmonic support in the low-mids (100-250Hz), while a separate sub-bass synth can provide the clean, powerful low-end below 80Hz that translates well to all systems. This separation is the key to achieving a powerful yet clean foundation that doesn’t turn to mud on small speakers.
Stop « fixing » your mix and start designing it for the environment where it will be heard. By adopting these architectural principles of pop production—vocal primacy, transient focus, and mid-range dominance—you can build a hard rock track that has the power, aggression, and clarity to stand shoulder-to-shoulder with any song on a major playlist.