The sonic superiority of a vinyl record isn’t determined by its weight or hype, but by the integrity of its dynamic range, preserved from the original master recording to the physical groove.
- True analog and high-resolution sourced pressings retain transient punch and breathing room, while many modern reissues are merely CD-quality audio pressed to vinyl, identifiable by a tell-tale frequency cutoff.
- Physical clues like mastering signatures in the dead wax, and technical specifications like RPM speed, offer strong indicators of quality, but the ultimate proof lies in understanding the source master.
Recommendation: Learn to use your ears and forensic tools like spectrograms to verify the audio’s origin, allowing you to bypass marketing hype and build a collection based on genuine sonic quality.
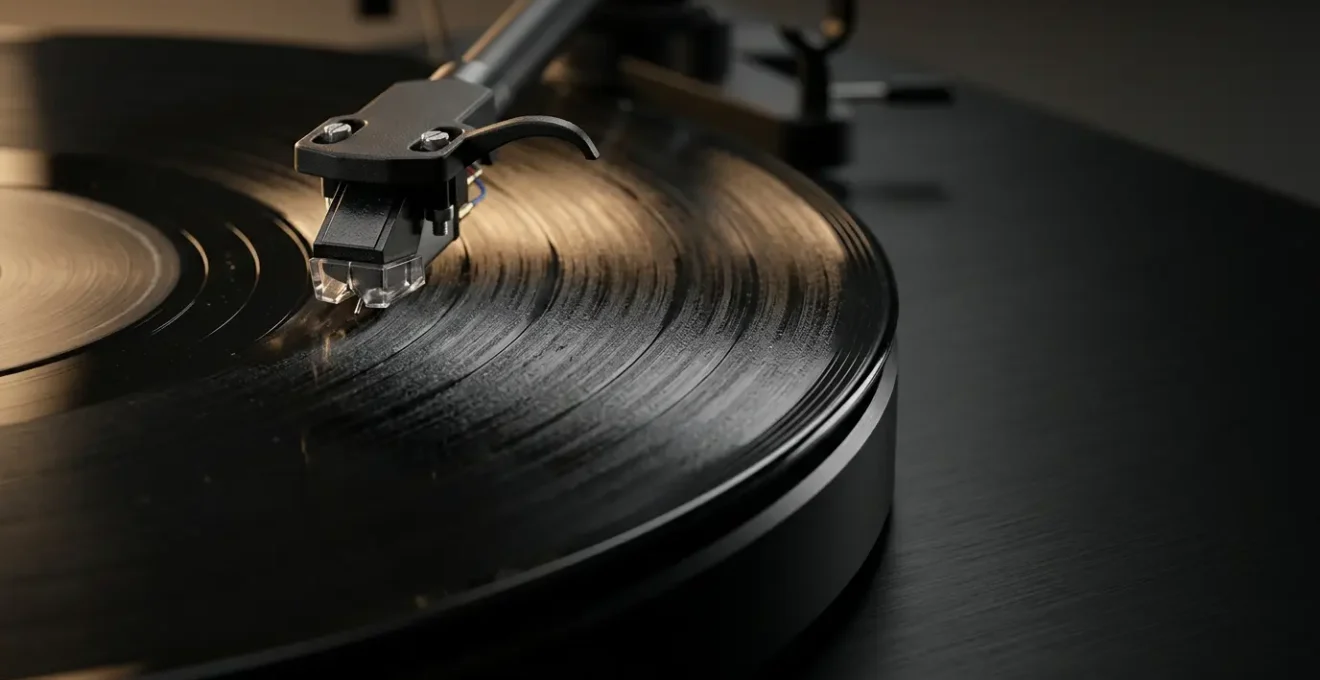
There’s a palpable frustration among discerning vinyl collectors. You invest in a high-end system, meticulously align your cartridge, and anticipate the warm, expansive sound of analog. Yet, too often, a newly acquired record sounds… thin. Lifeless. It lacks the punch and depth you crave, feeling more like a compressed stream than a rich, physical artifact. This experience of « wafer-thin » sound is the unfortunate hallmark of a cheap digital transfer pawned off as a premium vinyl release, a practice that has become rampant in the booming market.
The common advice often circles around familiar platitudes: look for 180-gram pressings, hunt down first editions, or check for specific symbols in the dead wax. While not entirely without merit, these are merely surface-level indicators. They don’t address the fundamental issue: the quality of the master source and the skill of the engineer who cut the lacquer. A heavy disc pressed from a brickwalled CD master from the « Loudness War » era is simply a heavier piece of plastic containing bad audio. The real art of identifying a superior pressing lies deeper.
The true key is to stop thinking like a collector and start listening like a mastering engineer. This guide abandons the superficial checklist to instead decode the engineering principles and physical realities that separate a breathtakingly dynamic record from a flat, disappointing imposter. It’s about understanding the audible consequences of the signal path, from the choice of master tape to the geometry of the groove itself. By learning to hear the mastering decisions and spot the forensic fingerprints of a digital source, you can arm yourself with the knowledge to build a collection that delivers genuine audiophile-grade sound, not just the illusion of it.
This comprehensive guide will walk you through the critical concepts that define audio fidelity on vinyl. We will explore the science behind dynamic range, the purity of direct-to-disc recording, the physical advantages of different playback speeds, and the forensic clues hidden in plain sight on your records.
Summary: The Engineer’s Guide to Spotting Genuinely High-Quality Vinyl
- Why High Dynamic Range Masters Sound Quiet but Punchy on High-End Systems?
- How Does Cutting Lathes Directly From the Performance Change the Sound?
- 33 vs 45 RPM: Which Speed Offers Higher Fidelity for Audiophile LPs?
- The Dead Wax Clue That Reveals Which Engineer Mastered Your Record
- How to Adjust Tonearm Tracking Force to Avoid Inner Groove Distortion?
- How to Remaster Analog Anthems for Spotify Without Losing Their Dynamic Range?
- FLAC or MP3:How to Write a Guitar Riff That Defines a Song Without Knowing Music Theory?
- How to Start a Valuable Vinyl Collection Without Overpaying for Hype?
Why High Dynamic Range Masters Sound Quiet but Punchy on High-End Systems?
One of the most common misconceptions is that a « quiet » record is a poorly mastered one. In reality, for an audiophile, a lower average volume is often the first sign of a high-quality, dynamic master. This comes down to a crucial engineering concept: the crest factor. The crest factor is the difference in decibels between the average level (the body of the music) and the peak level (the sharpest, loudest transients, like a snare drum hit or a cymbal crash). A heavily compressed, « loud » master has a very low crest factor, meaning the peaks are squashed down close to the average level. The result is a sound that is constantly loud but lacks impact and feels fatiguing.
In contrast, a master with a high dynamic range preserves this gap. The quiet parts are allowed to be truly quiet, and the loud peaks are allowed to explode with full force. This is why it sounds « punchy » on a good system—your amplifier has the headroom to reproduce those sudden peaks without distortion, and you can feel the kick drum hit your chest. Renowned mastering engineer Bob Katz advocates for a healthy dynamic range in vinyl mastering. For high-quality audio, a crest factor of around 14 dB is considered a great target, providing ample room for transients to breathe.
Typically music has a crest factor of 10 to 20 dB (much more in some cases). That loosely means there is a 10 to 20 dB difference between the peak and the ‘average’ electrical power of the music.
– ProSoundWeb Technical Team, Tech Tip Of The Day: The Crest Factor In Mastering
When you place the needle on a record with high dynamic range, you have to turn the volume knob up higher to reach a comfortable listening level. This is a feature, not a bug. It signals that the engineer prioritized transient response and musicality over raw, brute-force loudness. It’s the audio equivalent of a sigh of relief after being in a noisy room, allowing the music to have light, shade, and emotional impact.
How Does Cutting Lathes Directly From the Performance Change the Sound?
The ultimate expression of analog purity is the « direct-to-disc » recording. This method represents the shortest possible signal path: the musicians’ performance is mixed live in the studio and sent directly to the cutting lathe, which etches the sound into a lacquer master in real time. There is no tape. There is no digital conversion. There are no intermediate steps where noise, distortion, or generational loss can be introduced. The result is a level of immediacy, clarity, and transient detail that is physically impossible to achieve through any other method.
This process is a high-wire act for everyone involved. The musicians must perform a complete album side flawlessly in a single take. The mixing engineer must get the balance perfect on the fly. And the cutting engineer must ensure the lathe is operating optimally. Any mistake by anyone means starting the entire side over. This pressure and focus, however, is precisely what contributes to the unique sonic signature of these recordings. The sound is captured with a « you are there » quality, offering unparalleled spatial imaging and a startlingly realistic presentation.

While direct-to-disc albums are rare and often expensive due to their demanding production, they serve as an invaluable reference. Listening to one is an education in what is sonically possible when the signal path is kept pristinely analog and direct. They reveal the subtle layers of haze that even the best magnetic tape can add and stand in stark contrast to the flat, two-dimensional sound of many digital-to-vinyl pressings. To train your ears, critically listening to some of these landmark recordings is essential:
- Sheffield Lab catalog (Lab series 9-24): Pioneering audiophile recordings from the 1970s featuring jazz and classical performances.
- Thelma Houston – ‘I’ve Got the Music in Me’ (Sheffield Lab): Listen for the exceptional transient response on percussion and the vivid stereo image.
- Dave Grusin – ‘Discovered Again!’ (Sheffield Lab): A perfect record to compare against later tape-based reissues to hear the difference in signal clarity.
- East Wind Japanese pressings: Exceptional piano trio recordings demonstrating unparalleled clarity from the elimination of tape generation loss.
33 vs 45 RPM: Which Speed Offers Higher Fidelity for Audiophile LPs?
The choice between 33⅓ and 45 revolutions per minute (RPM) is not merely about playing time; it’s a fundamental engineering trade-off that directly impacts audio fidelity. All other factors being equal, a record cut at 45 RPM will offer superior sound quality. The reason lies in the physics of how information is stored in a vinyl groove. At a higher speed, the same amount of musical information is spread out over a longer physical distance of the groove. This is a significant advantage.
Technical measurements reveal that a 45 RPM pressing has a 36% longer physical wavelength for a given frequency compared to its 33⅓ RPM counterpart. This « stretching » of the waveform has two major benefits. First, it makes it easier for the stylus to trace the complex modulations of the groove, especially high frequencies, which are represented by very fine, intricate wiggles. Better tracing means less distortion and a clearer, more detailed top end. Second, it improves the signal-to-noise ratio. Because the musical signal is physically larger, the inherent surface noise of the vinyl medium becomes smaller in proportion, resulting in a blacker, quieter background.
This is why many audiophile labels release deluxe editions of albums as double LPs cut at 45 RPM. The trade-off is inconvenience—you have to get up to flip the record more often—but the sonic payoff is undeniable. The soundstage often appears wider, instruments have better separation, and high-frequency details like cymbal decay and vocal sibilance are rendered with greater realism and less distortion.
albums pressed at 45 RPM tend to sound better. As renowned mastering engineer Bernie Grundman has explained… in record mastering, the higher the recorded level and frequency, the greater the groove curvature.
– Bernie Grundman (paraphrased), Warped Vinyl Aficionado: Sound Science Analysis
So, when faced with a choice, the 45 RPM version is almost always the sonically superior option. It’s a clear indicator that the label prioritized audio fidelity over manufacturing cost or convenience, a strong clue you’re holding a pressing made for critical listening.
The Dead Wax Clue That Reveals Which Engineer Mastered Your Record
The « dead wax »—the smooth, ungrooved area of vinyl between the last song and the center label—is the record’s birth certificate. This small strip of real estate contains a wealth of information for the vinyl detective, etched or stamped directly into the master lacquer. Deciphering these markings can tell you not just where and when a record was pressed, but, most importantly, *who* was at the helm of the cutting lathe. The identity of the mastering engineer is one of the single most reliable predictors of a record’s sonic quality.
Legendary engineers like Bernie Grundman (BG), Robert Ludwig (RL), Kevin Gray (KPG), and Chris Bellman (CB) built their reputations by consistently cutting lacquers that sound dynamic, detailed, and musical. Their hand-etched initials in the dead wax are a seal of quality. These engineers are masters of their craft, understanding the delicate art of transferring the energy of a master tape into a physical groove without compromising its integrity. They know how to handle challenging frequencies, optimize levels for the vinyl medium, and make mastering decisions that serve the music.
Beyond the engineer’s signature, the dead wax also contains the matrix number. This primary alphanumeric code identifies the specific lacquer cut. Typically, a lower number suffix (e.g., -1A, -A1) indicates an earlier cut, made when the master tape was freshest and often resulting in a better-sounding pressing than a -4G cut made much later. You can also find symbols indicating the pressing plant (e.g., ‘P’ for Pitman, ‘T’ for Terre Haute, or specific logos for plants like RTI and Pallas), which can also be an indicator of quality control. Learning to read these clues transforms record shopping from a game of chance into a calculated hunt for sonic excellence.
Your Action Plan: The Dead Wax Detective’s Guide
- Transcribe Everything: Under a bright, angled light, carefully locate the dead wax area. Transcribe ALL characters you see—both stamped and hand-etched—exactly as they appear on both sides of the record.
- Identify the Matrix Number: Isolate the primary alphanumeric code (e.g., ‘S-1-54238-G1’). Lower numbers or early letters in the suffix often point to earlier, more desirable stampers.
- Hunt for the Signature: Look for the mastering engineer’s initials. These are almost always hand-etched and can be subtle, sometimes appearing as a small, stylized signature at a different clock position from the stamped matrix code.
- Spot the Pressing Plant: Search for symbols, letters, or codes that identify the manufacturing location. A stamped ‘P’ or ‘T’ or the logo for a renowned plant like ‘RTI’ (Record Technology Inc.) reveals its origin.
- Cross-Reference on Discogs: The final step is crucial. Search the exact matrix string on Discogs.com. This will lead you to the specific pressing entry, where you can read community reviews and comments about its sound quality before you buy.
How to Adjust Tonearm Tracking Force to Avoid Inner Groove Distortion?
Even the finest pressing can sound terrible if your playback equipment isn’t properly configured. One of the most common and frustrating sonic artifacts is Inner Groove Distortion (IGD). This is the fuzzy, sibilant, and pinched sound that can plague the last few tracks on a record side. The cause is purely geometric: as the stylus travels towards the center of the record, the groove velocity decreases, and the stylus has a harder time accurately tracing the tightly packed waveforms, leading to tracing errors.
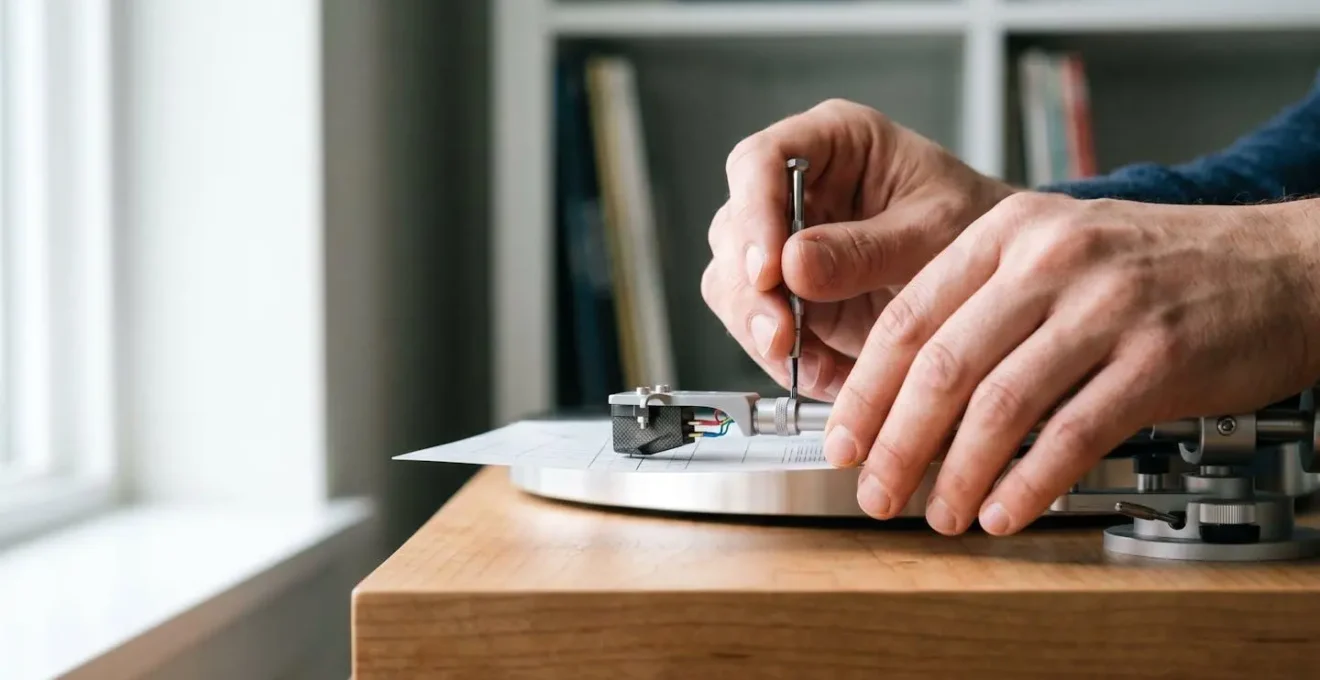
While some degree of IGD is inherent to the vinyl format, it can be drastically minimized with a precise turntable setup. This isn’t about buying more expensive gear; it’s about optimizing the geometry of what you already own. The most critical factor is cartridge alignment. Using an alignment protractor (which often comes with a turntable or can be downloaded and printed for free) ensures that the stylus is as close to tangent to the groove as possible across the entire record surface. An improperly aligned cartridge is the number one cause of excessive IGD.
Once alignment is correct, you can fine-tune other parameters. Anti-skate force, which counteracts the tonearm’s natural tendency to pull towards the center of the record, should be set to roughly match your tracking force. But the Vertical Tracking Force (VTF), the downward pressure of the stylus on the groove, is a powerful tool for combating stubborn IGD. If you’ve aligned everything correctly but still hear sibilance on the inner tracks, try slightly increasing the VTF within the upper range recommended by your cartridge manufacturer. A little extra pressure can help the stylus maintain better contact with the challenging inner grooves, significantly cleaning up the sound. Troubleshooting IGD is a process of elimination:
- Priority 1 – Verify Cartridge Alignment: Use a two-point protractor (Baerwald, Loefgren, or Stevenson geometry) to ensure stylus tangency at the null points. This addresses the root geometric cause of IGD.
- Priority 2 – Check and Adjust Anti-Skate: Set anti-skate force to approximately match your tracking force. A grooveless test record is the ideal tool to verify that the stylus doesn’t drift left or right.
- Priority 3 – Optimize Vertical Tracking Force (VTF): If sibilance persists *only* on inner tracks, experiment with a VTF in the upper third of the manufacturer’s recommended range (e.g., if the range is 1.8-2.2g, try 2.0-2.2g).
- Priority 4 – Assess Record Quality: Be aware that no setup adjustment can fix a poorly mastered record. If too much music is crammed onto a side, leading to extreme groove crowding near the label, some distortion is unavoidable.
How to Remaster Analog Anthems for Spotify Without Losing Their Dynamic Range?
To understand why so many modern vinyl reissues sound flat, we must first understand how their digital source material was mastered. The question of remastering for a streaming service like Spotify seems unrelated to vinyl, but it’s at the very heart of the problem. For nearly two decades, the music industry was locked in a « Loudness War, » where mastering engineers were pressured to make CDs as loud as possible to stand out on the radio or in a multi-disc changer. They achieved this using brickwall limiters, which aggressively squash the dynamic range, resulting in a hyper-compressed, fatiguing sound.
The turning point came with the rise of streaming. To create a consistent listening experience, streaming platforms like Spotify normalize playback to a standard level, currently around a -14 LUFS integrated loudness target. LUFS (Loudness Units Full Scale) is a sophisticated measure of perceived average loudness. This normalization completely nullified the « advantage » of hyper-compressed masters. A track mastered at an ear-splitting -6 LUFS is simply turned down by the platform to match the playback level of a more dynamic track mastered at -12 LUFS. The difference is that the over-compressed track sounds worse after being turned down, because its dynamics were permanently destroyed for a loudness that is no longer utilized.
Case Study: The End of the Loudness War
In the CD era (1990s-2010s), mastering levels were pushed to extremes, often hitting -6 to -4 LUFS with dynamic ranges as low as DR3. When these masters were used as the source for a vinyl reissue, the result was a flat, lifeless record. With the advent of loudness normalization, the incentive for hyper-compression vanished. An over-limited master not only sounds worse on Spotify (because its sacrificed dynamic detail is audible once the volume is matched), but it also creates a poor vinyl cut. Today, engineers targeting streaming platforms aim for healthier levels like -11 to -14 LUFS, which ironically preserves more dynamics—making these modern high-resolution digital files a far superior source for vinyl pressing than a « brickwalled » CD master from 2005.
This is the critical takeaway for the vinyl collector: a record that says « remastered » could mean anything. If it was remastered from a 1990s CD master, or sourced directly from it, you are essentially buying a vinyl copy of a file that was ruined for a defunct format. A genuinely good remaster for vinyl will ideally come from the original analog tapes or, failing that, a modern high-resolution digital transfer that was mastered with dynamic range intact, not one made for the Loudness War.
FLAC or MP3:How to Write a Guitar Riff That Defines a Song Without Knowing Music Theory?
The debate between lossless (FLAC) and lossy (MP3) formats is well-known in digital audio, but its consequences are rarely discussed in the context of vinyl. Think of a defining guitar riff—its power isn’t just the notes, but the texture, attack, and harmonic overtones. A compromised digital source, much like a poorly learned riff, loses that essential data before it even reaches the cutting lathe. The most egregious offender is a vinyl record sourced not from a high-resolution file or analog tape, but directly from a standard 44.1kHz CD master. This is the « ghost in the machine » that audiophiles dread, and there is a forensic tool that can prove its existence.
The tool is a spectrogram, a visual representation of the frequency content of an audio file over time. You can generate one for free using software like Audacity. A standard audio CD has a sampling rate of 44.1kHz, which, according to the Nyquist theorem, can only reproduce frequencies up to half that value: 22.05kHz. In a spectrogram, this limitation appears as a stark, vertical « brick wall. » All audio information simply stops dead at 22.05kHz. In contrast, a true analog recording or a high-resolution digital master (like 24-bit/96kHz) will show frequency information extending well beyond this cutoff, typically rolling off naturally at much higher frequencies.
This « CD fingerprint » is the smoking gun. If a vinyl record was sourced from a CD master, a high-quality digital recording of that vinyl (a « needledrop ») will exhibit the same 22.05kHz cutoff. It proves that any musical information above that frequency was never there to begin with, no matter how much « analog warmth » the vinyl medium is claimed to add. With the explosive growth of the format, where in 2024, 44 million vinyl LPs were sold in the US alone, the temptation for labels to cash in with cheap, CD-sourced pressings is immense. Learning this test empowers you to verify their claims.
Here is how you can perform this test yourself:
- Step 1 – Obtain Digital File: Record a track from the vinyl in question into your computer at a high sample rate (e.g., 96kHz). Alternatively, find a high-quality needledrop FLAC file of the same pressing online.
- Step 2 – Load into Audacity: Download the free Audacity software and import the audio file.
- Step 3 – Generate Spectrogram View: From the track’s dropdown menu on the left, select « Spectrogram » to change the display from a waveform to a frequency plot.
- Step 4 – Check for the CD Fingerprint: Look at the top of the spectrogram. If you see a hard, flat line where all frequency content abruptly stops around 22kHz, you’ve found it. This is the definitive proof of a 44.1kHz source.
- Step 5 – Compare Against a True Hi-Res Source: A genuine high-resolution or analog-sourced file will show frequency content extending smoothly well beyond 22kHz, often up to 30kHz, 40kHz, or higher, with a natural, gentle roll-off, not a brick wall.
Key Takeaways
- True audio quality on vinyl is defined by dynamic range and signal path integrity, not by the weight of the plastic.
- Mastering engineer signatures in the dead wax (e.g., RL, BG, KPG) are a far more reliable indicator of quality than « first pressing » hype.
- A spectrogram can provide definitive proof of whether a vinyl record was sourced from a limited, CD-quality digital master by revealing a hard frequency cutoff at 22.05kHz.
How to Start a Valuable Vinyl Collection Without Overpaying for Hype?
Building a sonically valuable collection requires a paradigm shift: prioritize pressing quality and physical condition over collector-driven hype. The obsession with « first pressings » often leads collectors to pay exorbitant prices for records that may not even be the best-sounding versions. A worn-out, noisy « holy grail » first pressing will always provide a worse listening experience than a near-mint copy of a superior later pressing. The foundation of high-quality sound is a clean, quiet surface and, most importantly, a masterfully cut lacquer.
Often, reissues from audiophile labels like Mobile Fidelity Sound Lab (MFSL) or Analogue Productions, or those cut by renowned engineers like Kevin Gray, can sound significantly better than an original. They benefit from access to the original master tapes combined with superior modern cutting equipment and meticulous quality control. Furthermore, the country of origin can be a major factor. For example, in the 1960s and 70s, Japanese and German pressing plants were legendary for their quiet, virgin vinyl and exacting standards, often surpassing their US or UK counterparts. A 1970s Japanese pressing of a classic rock album can sometimes offer more clarity and a lower noise floor than a coveted US first press.
A pristine, near-mint copy of a well-regarded second pressing will always provide a superior listening experience compared to a noisy, worn-out ‘holy grail’ first pressing. The foundation of high-quality sound is a clean, quiet surface.
– Micro Forum, How to Identify Original Pressing Vinyl
The intelligent collector applies all the knowledge gathered. You use the dead wax to identify the engineer. You understand the implications of a 45 RPM cut. You listen for dynamics, not just loudness. You’re willing to do the forensic work with a spectrogram to expose a poor digital source. This approach frees you from the whims of the collector’s market. Instead of chasing the same few « hype » records, you can uncover hidden gems—later pressings, foreign pressings, or audiophile reissues that deliver champagne sound on a beer budget. Your collection becomes valuable not for its potential resale price, but for the consistent, breathtaking quality of the listening experience it provides.
Start applying this engineering mindset to your next record store visit. Scrutinize the dead wax, question the « hype » stickers, and trust your ears above all. Building a truly great-sounding vinyl collection is a journey of discovery, and now you have the map and the compass to navigate it with confidence.