
Contrary to popular belief, The Beatles’ creative genius wasn’t magic; it was a system born from technical limitations that modern producers can replicate to escape digital overload.
- Restricting track counts forces stronger, more decisive arrangement choices by reducing cognitive load.
- Committing to sounds and « bouncing » tracks, even in a DAW, fosters a mindset of decisive action over endless tweaking.
Recommendation: Start your next project by intentionally limiting yourself to 16 tracks. The focus you’ll gain in arrangement and commitment will be a more powerful creative tool than any new plugin.
In the modern digital audio workstation (DAW), we are gods. With a nearly infinite number of tracks, plugins, and virtual instruments, any sound imaginable is just a few clicks away. Yet, this limitless power often leads to a creative paralysis known as the « paradox of choice. » We spend hours auditioning synth presets or tweaking compressor settings, only to end up with a cluttered, unfocused mix. Many producers believe the solution is yet another plugin or a faster computer, chasing a technical fix for what is fundamentally a workflow problem.
But what if the answer isn’t adding more, but taking away? What if the key to unlocking the focused creativity that defined the most iconic records in history lies in embracing constraints? The Beatles’ work at Abbey Road Studios, particularly during their mid-60s experimental phase, provides a masterclass. Forced to work with 4-track, and later 8-track, tape machines, they and their engineering team, led by George Martin and Geoff Emerick, didn’t just cope with limitations; they weaponized them. They turned technical boundaries into creative catalysts.
This article isn’t a nostalgic plea to abandon digital tools for vintage gear. Instead, it’s a strategic guide for the modern producer. We will deconstruct the Abbey Road workflow to extract a repeatable system of discipline. By applying the principles of commitment, cognitive focus, and « arrangement by subtraction » that The Beatles were forced to adopt, you can transform your DAW from a playground of infinite distractions into a focused instrument for creating your best work.
This exploration will provide you with a practical framework. We’ll examine the science behind creative constraints, offer step-by-step guides for replicating vintage techniques digitally, and analyze the collaborative and financial implications of a studio-centric approach in today’s music economy. Get ready to rethink your process.
Summary: Unlocking the Abbey Road Mindset for Modern Production
- Why Having Only 4 Tracks Forced Better Arrangement Decisions in the 60s?
- How Does Limited Track Count Force More Creative Arrangement Decisions?
- How to « Bounce » Tracks to Free Up Space Without Adding Too Much Noise?
- How to Create Psychedelic Tape Loops Using Digital DAWs?
- How to Stack Three-Part Harmonies That Blend Perfectly in the Mix?
- Lennon or McCartney: Which Songwriting Approach Fits Your Band’s Dynamic?
- The Studio-Only Dilemma: Can a Modern Band Survive Without Touring Like The Beatles Did?
- How to Capture the « Warmth » of Analog Tape in a Digital Home Studio?
Why Having Only 4 Tracks Forced Better Arrangement Decisions in the 60s?
The conventional wisdom is that The Beatles were creative *despite* their 4-track recorders. The truth is more profound: they were creative *because* of them. The limitation wasn’t a barrier; it was a cognitive funnel. With a finite number of tracks, every single part had to justify its existence. There was no room for « maybes » or layers added « just in case. » This forced a level of discipline and commitment that is often absent in the limitless digital world. Every decision was permanent, demanding a focus on the song’s core elements: melody, harmony, and rhythm.
This isn’t just studio folklore; it’s backed by cognitive science. The human brain is not built for infinite choice. In fact, research demonstrates that cognitive control capacity is remarkably limited to processing just a few pieces of information at once. When faced with hundreds of tracks and plugins, our decision-making ability degrades. The 4-track machine, by its very design, kept the number of variables within a manageable cognitive window, allowing for deeper, more meaningful creative choices rather than shallow, sprawling ones.
The fundamental constraint of maintaining approximately 4±1 information chunks severely restricts complex comparisons.
– Global Council for Behavioral Science, The Impact of Cognitive Load on Decision-Making Efficiency
This « arrangement by subtraction » meant that instrumentation had to be clever. A single guitar part might need to imply a whole rhythm section, or a piano and bass might have to be recorded together on a single track, forcing the players to perform as a tight, cohesive unit. This is the essence of the Abbey Road mindset: the constraint isn’t the obstacle, but the tool that carves the sculpture.
How Does Limited Track Count Force More Creative Arrangement Decisions?
The theory of cognitive load becomes tangible when you look at The Beatles’ mid-60s sessions. They were in a constant battle with their equipment, and this battle forged their sonic innovation. The arrangement wasn’t a separate stage of production; it was intrinsically linked to the engineering puzzle of fitting everything onto the tape. You couldn’t just « add another synth pad. » You had to ask: « What can we combine or sacrifice to make space for this new idea? »
This process demanded foresight. An arrangement had to be planned, with parts interlocking like a jigsaw puzzle. For example, if you knew three tracks were already filled with the basic rhythm section (drums, bass, guitar), the fourth and final track was precious real estate. Would it be a lead vocal? A piano overdub? A complex harmony stack? This forced a hierarchy of importance, ensuring that only the most impactful ideas made it to the final recording. It prevented the « sonic mud » that plagues many modern productions, where countless layers compete for attention.
Case Study: The Technical Chess Game of Abbey Road
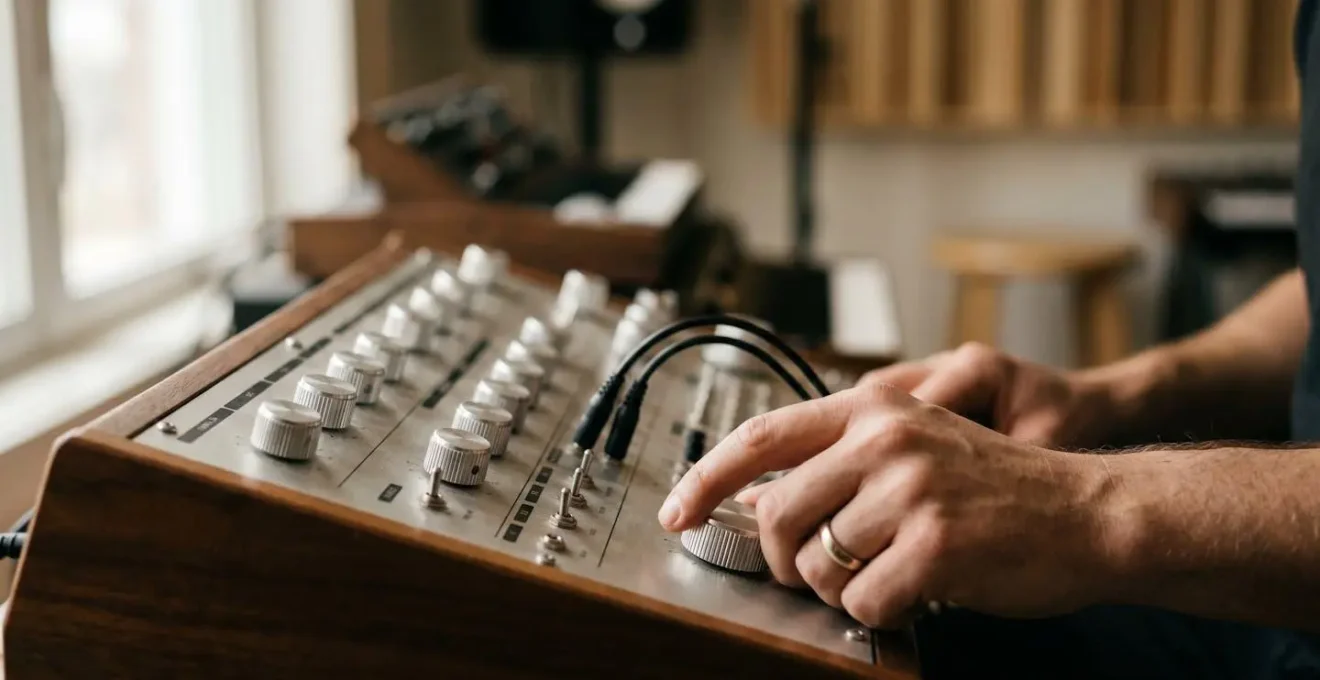
During their most experimental period, The Beatles worked on a REDD.51 console with only eight microphone inputs and a four-track STUDER J37 tape machine. As an analysis of their sessions reveals, this setup forced engineers Geoff Emerick and Ken Scott into a constant process of submixing. To make room for new parts, like the orchestral swells on « A Day in the Life, » they had to mix and « bounce » multiple previously recorded tracks onto a single track of a second machine. This was a high-stakes, destructive process. A single mistake could ruin hours of work, making every arrangement and mixing decision critically important before hitting record.
This methodology meant that the arrangement was committed early. The balance between the drums and bass on track one was decided permanently. This is the polar opposite of the modern workflow, where we keep every element on a separate track, preserving infinite tweakability until the final moments. The Beatles’ limitation forced them to build their song on a foundation of solid, unchangeable decisions.
How to ‘Bounce’ Tracks to Free Up Space Without Adding Too Much Noise?
In the analog era, « bouncing » was the art of mixing several tracks (say, three harmony vocals) down to one, freeing up the original tracks for more recording. This was a nerve-wracking process. Each pass to a new generation of tape added noise, or « tape hiss, » and you were permanently « printing » the mix. There was no « undo » button. The balance, panning, and effects were baked in forever. The key was careful gain staging—ensuring signal levels were hot enough to mask the noise floor but not so hot they caused tape distortion (unless that was the desired effect).
Today, we don’t have to worry about tape hiss, but we can adopt the spirit of this technique to regain focus. The modern equivalent is « committing » or « freezing » your tracks. Instead of keeping a virtual instrument and a chain of five plugins running live, render the track to a new audio file with all the effects printed on it. This is what I call destructive commitment. It forces you to make a decision and move on. Is the reverb on that vocal correct? Commit. Is the EQ on the snare right? Commit.
This does more than just save CPU. It cleans up your session visually and mentally, transforming a sea of editable parts back into a handful of solid, musical elements. It stops the endless tweaking and pushes you forward in the songwriting and production process. To do this cleanly in a DAW, group the tracks you want to combine (e.g., all background vocals), get their relative balance and panning perfect, then route them to a new audio track and record the output. Once you’re happy with the submix, deactivate the original tracks. You’ve just cleared your workspace and, more importantly, your mind.
How to Create Psychedelic Tape Loops Using Digital DAWs?
The Beatles’ use of tape loops, famously showcased on « Tomorrow Never Knows, » is a perfect example of creativity born from hacking the available technology. It wasn’t a feature of the tape machine; it was a physical process of cutting a piece of recorded tape, splicing the ends together to form a loop, and then re-threading it on a machine for continuous playback. By creating multiple loops of different sounds (like McCartney’s laughter or a distorted sitar) and fading them in and out live during the mixdown, they created a swirling, chaotic soundscape that had never been heard before.

This was systematic serendipity—a structured process designed to create happy accidents. You can easily replicate this in any DAW, moving beyond simple copy-and-paste looping to create genuinely evolving textures. The key is to introduce subtle, asynchronous variations, just as running multiple physical tape loops would inevitably cause them to drift in and out of time with each other.
Action Plan: Crafting Evolving Digital « Tape » Loops
- Record or select a source: Start with a short melodic or rhythmic phrase, ideally 2-4 bars long, to serve as your base loop.
- Duplicate the loop: Place the same loop on several different audio tracks in your DAW.
- Introduce phasing with detuning: Use your DAW’s pitch or tuning controls to slightly detune each copy by different micro-amounts (e.g., one at +15 cents, another at -25 cents). This creates subtle, shifting phase relationships.
- Create spatial separation: Pan each loop to a different position in the stereo field. Avoid placing everything in the center; use hard left, hard right, and positions in between.
- Let the system run: Press play and let the loops run for several minutes. Listen for the emergent patterns and polyrhythms that appear as the loops drift in and out of sync. You can automate the volume faders to bring different loops to the forefront, mimicking the live mixing of the original technique.
This method moves beyond static repetition and creates a living, breathing texture that feels authentically psychedelic and unpredictable. It’s about building a system and then letting it play out.
How to Stack Three-Part Harmonies That Blend Perfectly in the Mix?
Another area where track limitations forced ingenuity was in vocal arrangements. The dense, perfectly blended harmonies of songs like « Because » or « Nowhere Man » weren’t achieved by endlessly stacking dozens of vocal tracks. They were meticulously arranged and performed, often with multiple singers gathered around a single microphone, and then bounced down to a single track. This required a deep understanding of harmony and vocal production.
To achieve that classic, cohesive blend in a modern DAW, focus on three core principles: arrangement, performance, and processing.
- Arrangement: The foundation is a strong vocal arrangement. Start with the main melody. The first harmony is typically a third above or below the melody. The second harmony is often a fifth above the root note of the chord. This classic triad structure creates a full, consonant sound. Pay attention to « voice leading »—ensure each harmony line is a smooth, singable melody in its own right, avoiding awkward jumps.
- Performance: The blend starts with the performance. The timing and pitch of the singers must be as tight as possible. Even small inconsistencies in phrasing or the pronunciation of consonants can make harmonies sound sloppy. The goal is for the singers to sound like a single entity, not three separate individuals.
- Processing: In the mix, the key is to treat the harmonies as a single unit. Route all three harmony tracks to a « Vocal Bus » or « Group Track. » Apply a single compressor to this bus to « glue » them together. A gentle compression (2-4 dB of gain reduction) will smooth out the dynamics and make the stack feel more cohesive. Follow this with a touch of shared reverb to place them all in the same acoustic space.
Finally, use panning and volume to create a « pyramid » of sound. The lowest harmony part can be panned slightly to one side and sit lower in the mix, the main melody in the center, and the highest harmony panned to the other side, slightly more present. This creates a balanced and wide vocal sound without cluttering the mix.
Lennon or McCartney: Which Songwriting Approach Fits Your Band’s Dynamic?
The Lennon-McCartney partnership is often mythologized as a single, unified entity, but the reality was more complex and evolved over time. Understanding their different collaborative models can provide valuable insight for modern bands navigating their own creative dynamics. As John Lennon famously described their early method, it was often an intense, direct collaboration.
We wrote a lot of stuff together, one on one, eyeball to eyeball.
– John Lennon
This « eyeball to eyeball » approach is the classic image of two songwriters in a room, batting ideas back and forth until a song emerges. It’s highly creative but can also lead to friction if egos aren’t in check. It works best when partners share a deep musical chemistry and trust, allowing one to finish the other’s musical sentences. This method is ideal for the initial, explosive phase of a band’s creativity.
Evolution of a Partnership: From « Eyeball to Eyeball » to « Shoulder to Shoulder »
The Lennon-McCartney songwriting credit is one of the most famous in music history, representing approximately 180 songs published between 1962 and 1970. However, their process was not static. According to analysis of their partnership, it evolved from the early « eyeball to eyeball » method to a later « shoulder to shoulder » approach. In this later model, one writer would bring a nearly completed song (80-90% finished) to the other, who would then act as a brilliant editor, contributing a key element like a middle-eight, a lyrical twist, or a melodic counterpoint. McCartney’s optimism often smoothed Lennon’s introspective edges, and Lennon’s cynicism could ground McCartney’s more whimsical ideas, creating a perfect balance.
This « shoulder to shoulder » model is often more sustainable for long-term partnerships. It allows each writer to develop their individual voice while still benefiting from the other’s perspective. It respects authorship while leveraging the power of collaboration for the final polish. For your band, consider which model fits your current dynamic. Are you in a phase of intense, shared creation, or would you benefit more from a system where individuals bring well-developed ideas to the group for refinement?
The Studio-Only Dilemma: Can a Modern Band Survive Without Touring Like The Beatles Did?
In August 1966, The Beatles played their last commercial concert and became a studio-only band. This was a revolutionary move, made possible by an industry where album sales were the primary source of income. It allowed them to pour all their energy into groundbreaking records like *Sgt. Pepper’s Lonely Hearts Club Band* and *Abbey Road*. Today, many artists dream of this creative isolation, but the economic landscape has been turned upside down.
The modern music economy is overwhelmingly driven by live performance. While The Beatles could retreat to the studio, for most artists today, touring is not a choice; it’s a financial necessity. The numbers paint a stark picture. While live performances generated $25.9 billion globally in 2024, revenue from streaming remains painfully low for the vast majority of artists. With platforms like Spotify paying out fractions of a cent per stream, it’s nearly impossible to sustain a career on recorded music alone.
This creates a difficult dilemma. The very act of touring, which is necessary for survival, depletes the time and energy needed for deep, focused studio work. So, can a modern band survive without touring? It’s incredibly difficult, but not impossible. It requires building a direct and powerful connection with a dedicated fanbase that is willing to support the artist outside the traditional live circuit. This can include high-margin merchandise, subscription models (like Patreon), licensing music for film and TV, and offering exclusive content. It means treating the band as a multi-faceted media company, not just a recording act. It’s a path that requires as much entrepreneurial savvy as it does artistic vision, a challenge The Beatles never had to face.
Key Takeaways
- Embrace the « Cognitive Funnel »: Use track limitations to force strong, committed arrangement decisions from the start.
- Practice « Destructive Commitment »: Stop tweaking and start finishing by printing effects and bouncing tracks to audio, even in a DAW.
- Arrange by Subtraction: Ensure every part in your song serves a vital purpose. If it doesn’t, it’s cluttering the mix.
How to Capture the « Warmth » of Analog Tape in a Digital Home Studio?
The quest for « analog warmth » in a digital studio often sends producers down a rabbit hole of expensive tape emulation plugins. While these tools are powerful, they are only one piece of the puzzle. The classic sound of records like *Abbey Road* wasn’t just from the tape itself; it was the cumulative effect of the entire signal chain. Every component—the microphones, the preamps, the EQ, and the console—added its own subtle color, saturation, and non-linearities.
As author Kenneth Womack notes, the introduction of a new console at Abbey Road played a significant role in refining the band’s sound. This underscores that « warmth » is a holistic quality.
The expansive sound palette and mixing capabilities of the TG12345 enabled George Martin and Geoff Emerick to imbue the Beatles’ sound with greater definition and clarity.
– Kenneth Womack, in his study on the role of the TG12345 console
To capture this character in your DAW, think beyond a single tape plugin on your master bus. Instead, apply subtle instances of analog modeling throughout your mix. Use a console emulation on every channel to mimic the effect of summing through a physical desk. Add a touch of preamp saturation to individual tracks to give them weight. Use a tape machine plugin on busses (like your drum bus or vocal bus) to create cohesion. This « top-down » mixing approach, where you build your mix *into* the analog character from the beginning, yields far more authentic results.
Ultimately, the most important lesson from the analog era is not about the specific gear, but the disciplined workflow it enforced. The « warmth » we admire is the sound of decisive, committed choices being passed through a series of characterful electronics. By embracing limitations, practicing destructive commitment, and focusing on arrangement, you are already halfway there. The analog emulation plugins are just the final touch of paint on a well-built structure.
Begin applying these principles today. For your next project, limit yourself to 16 or 24 tracks. Force yourself to commit and bounce your instrument groups. You will find that the clarity and focus you gain in your arrangements are far more valuable than any new piece of software.