Contrary to popular belief, analog « warmth » isn’t a single effect you add; it’s the byproduct of a physical process and a disciplined workflow that digital tools can only approximate.
- Tape saturation adds musical harmonic complexity, it doesn’t just create distortion.
- Tape hiss is a textural element, a « sonic floor » that gives a recording life against digital silence.
- Creative limitations, like a low track count, force stronger arrangement decisions and a commitment that modern DAWs discourage.
Recommendation: To get closer to that sound, stop chasing a magic plugin and start thinking like a tape engineer—by embracing physical imperfection and creative commitment.
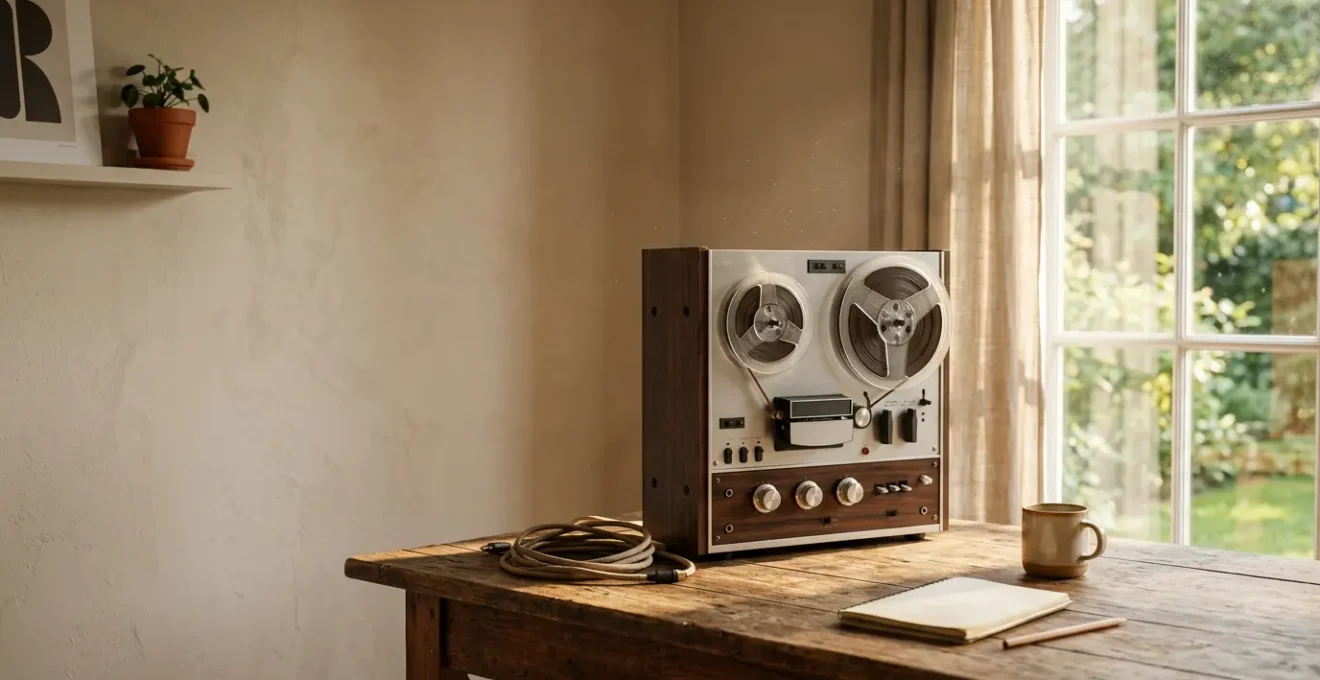
You’ve done everything by the book. Your recordings are clean, your edits are perfect, and your levels are balanced. Yet, when you listen back, something is missing. Your mix sounds sterile, cold, almost too perfect compared to the vibrant, larger-than-life records of the 70s. You’re chasing a ghost, a feeling the industry has bottled and labeled « analog warmth. » The internet will tell you to just download a tape saturation plugin and turn the « drive » knob. It’s a simple answer, but it’s the wrong one.
They’re missing the point. Real analog warmth isn’t an effect you can just slap on a track. It was never one thing. It was the sound of a physical process, the hum of electricity, the stretch of the tape, and the pleasant fight between the engineer and the machine. It was the ghost in the machine, the sum of all its beautiful, glorious imperfections. It was born from limitation, not from a drop-down menu of options. To truly capture that soul, you have to understand where it comes from—the physics, the workflow, and the mindset.
This guide isn’t another list of popular plugins. This is a look under the hood from someone who was there. We’ll explore why pushing a machine until it sings creates musical distortion, not just noise. We’ll learn to embrace the hiss and hum as part of the texture. Most importantly, we’ll see how the very constraints of the analog world—limited tracks and the inability to « undo »—forced a level of creativity and commitment that is the secret ingredient you’ve been missing.
To truly understand how to replicate this classic sound, we need to deconstruct its core components. This article breaks down the essential elements of the analog process, from the science of saturation to the philosophy of limitation that defined an era of recording.
Summary: Deconstructing the Soul of Analog Sound
- Why Pushing the Input Level on Tape Creates Pleasant Harmonic Distortion?
- How to Embrace Tape Hiss as a Texture Without It Becoming a Distraction?
- Plugin or Hardware: Which Tape Simulator Actually Fools the Ears?
- The Calibration Mistake That Makes Buying a Real Tape Machine a Money Pit
- How Does Limited Track Count Force More Creative Arrangement Decisions?
- Why Having Only 4 Tracks Forced Better Arrangement Decisions in the 60s?
- Why a Giant Metal Sheet Creates the Smoothest Vocal Reverb Tail?
- How to Build a DIY Echo Chamber to Replicate the Sound of the 60s?
Why Pushing the Input Level on Tape Creates Pleasant Harmonic Distortion?
The first thing any young engineer learned was the sound of hitting the tape—hard. You weren’t just making the signal louder; you were making it fatter, richer. This isn’t the harsh, ugly clipping you get in the digital world. This is tape saturation, and its magic lies in physics. When you overload magnetic tape, the machine doesn’t just give up. It starts to generate new frequencies that weren’t there before: harmonic overtones. Crucially, tape tends to produce even-order (2nd, 4th, etc.) and low-order odd (3rd) harmonics, which our ears perceive as musically pleasant. In fact, research on saturation fundamentals shows that 2nd and 3rd order harmonics are the most common and desirable components of this effect.
Think of it like this: a 2nd harmonic is simply the same note an octave higher. It adds weight and body without changing the note’s character. A 3rd harmonic adds a perfect fifth above that, introducing a subtle richness. This is the « warmth » everyone talks about. It’s not just distortion; it’s a form of musical enhancement. The machine is singing along with your track. As the Producertech team rightly points out, this process also naturally compresses the signal.
Tape saturation refers to the subtle distortion, harmonic enhancement, and dynamic compression that occur when an audio signal is recorded onto magnetic tape. Producers noticed that driving the tape harder resulted in a warm, musical distortion that softened transients, rounded out the lows, and added harmonic richness to the mids and highs.
– Producertech Audio Engineering Team, Tape Saturation: A Beginner’s Guide
This gentle compression, or « soft-knee » compression, tames the sharpest peaks of your audio (transients) in a smooth, non-linear way. It glues the sound together, making drums punchier and vocals sit better in the mix without feeling squashed. You weren’t just recording a signal; you were interacting with a physical medium, and that interaction is the first key to capturing its sound.
How to Embrace Tape Hiss as a Texture Without It Becoming a Distraction?
In today’s world of pristine digital silence, the concept of intentionally adding noise seems insane. But the « digital black » between notes is one of the most unnatural things about modern recording. Analog tape was never silent. It had a noise floor—a constant, subtle layer of hiss. We spent years fighting it with Dolby and other noise reduction systems, but in hindsight, we lost something important. That hiss is the canvas the music is painted on. It’s the sound of the air in the room, a subliminal signal to your brain that what you’re hearing is real and organic.
Embracing hiss isn’t about cranking up a noise generator until it’s annoying. It’s about treating it as a dynamic, textural element. It should be felt more than heard, filling the void and connecting the sonic elements together. The trick is to manage it, not eliminate it. It should rise and fall with the music, becoming a part of the performance itself.
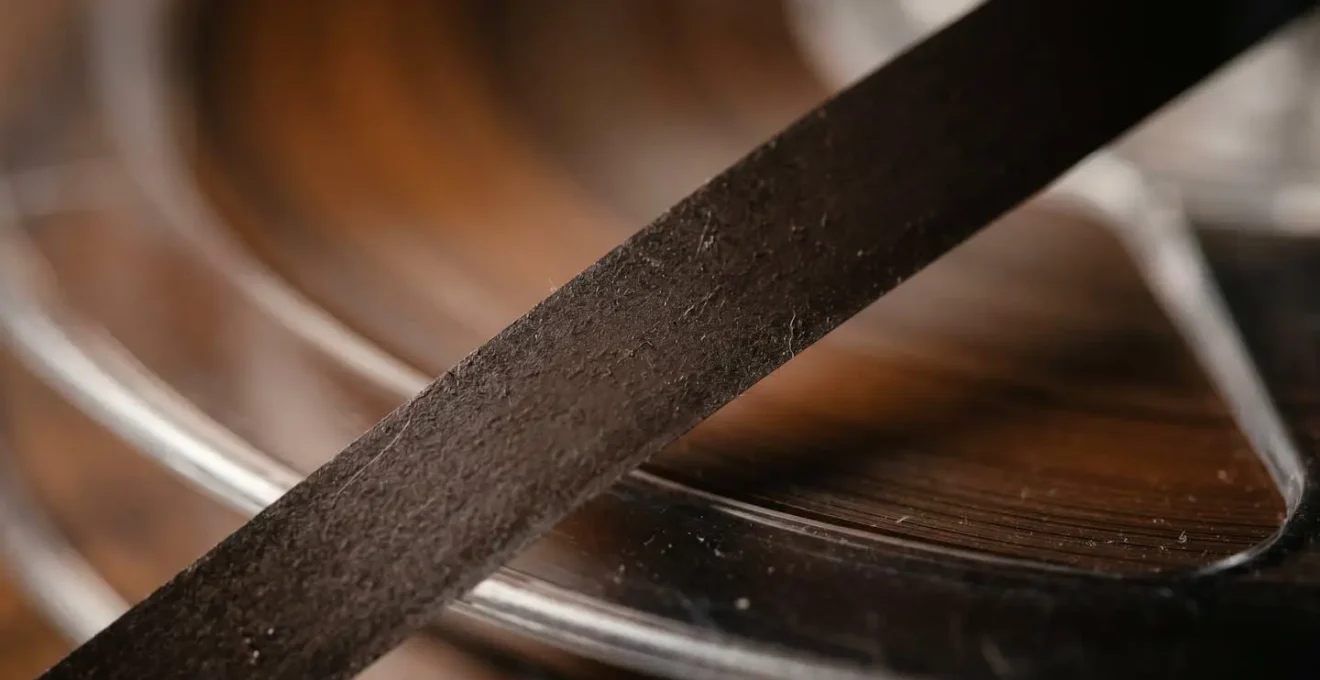
This image captures the physical reality we were working with. That textured surface, with all its microscopic imperfections, is where the sound lives. The hiss is the audible result of that physical contact. To manage it effectively in a digital environment, you need a workflow that treats it as an instrument, not a problem. This involves setting a base level, automating its presence for emotional impact, and even layering different noise sources for a more authentic character.
Action Plan: Taming the Hiss for Texture
- Initial Characterization: When tracking with a tape plugin, set the hiss parameter to a subtle level (around 10-20%). This establishes a baseline analog floor and eliminates the stark, unnatural silence of digital black.
- Dynamic Automation: Use your DAW’s automation to dynamically control the hiss. Increase its presence slightly during quiet, intimate passages (up to 30-40%) to enhance the mood, and pull it back during dense, loud sections where it would be masked anyway.
- Textural Layering: For truly unique character, don’t rely solely on plugin-generated hiss. Layer it with self-recorded noise sources like the noise floor of a cassette deck, the hum of a guitar amp, or even quiet vinyl crackle, blending them subtly to avoid synthetic, repetitive patterns.
Plugin or Hardware: Which Tape Simulator Actually Fools the Ears?
This is the million-dollar question. Can a piece of software truly replicate the electromechanical soul of a multi-ton machine? Let’s be honest: no. A real, well-maintained tape machine has a dynamic, almost chaotic life of its own that an algorithm will struggle to fully capture. The interaction of the specific tape formulation with the specific magnetic heads, powered by a unique transformer circuit, creates a complex soup of artifacts. But—and this is a big but—the gap has narrowed considerably, and for most, plugins are the only sane choice.
The « real thing » is a money pit. It requires constant, expert calibration, expensive tape, and parts that are getting harder to find. A good plugin gets you 95% of the way there without the headaches. The best ones don’t just model saturation; they model the entire signal path, including the specific characteristics of different tape speeds, formulations, and even the « wow and flutter » (slight pitch variations) that give tape its movement. The debate comes down to authenticity versus practicality.
This comparative analysis, based on a detailed breakdown, shows the trade-offs. While hardware like the Rupert Neve Designs 542 offers unparalleled low-end response and real-time harmonic generation, a top-tier plugin like the UAD Studer A800 provides incredible flexibility at a fraction of the cost, as detailed in an in-depth comparison of the two worlds.
| Characteristic | Hardware (Rupert Neve Designs 542) | Plugins (UAD Studer A800, Slate VTM) |
|---|---|---|
| Low-End Response | Rich, authentic tape bump with custom transformer circuit | Strong low-end enhancement with modeling accuracy varying by plugin |
| Harmonic Saturation | Subtle, real-time analog harmonic generation | Modeled harmonics with potential for repetitive patterns in wow/flutter |
| Workflow Flexibility | Fixed hardware parameters, requires maintenance | Multiple tape formulations, speeds, and calibrations accessible instantly |
| Cost & Accessibility | $1,500+ initial investment plus maintenance | $29-$349 (often on sale), subscription options available at $79-$149/year |
| CPU Impact | Zero CPU load | Moderate to high CPU usage, not suitable for every channel |
| Dynamic Response | True analog signal interaction with input levels | Static hiss patterns that may not react authentically to input signal changes |
Ultimately, the best advice comes with a dose of humility. Anyone who claims to have the definitive answer probably doesn’t. The real experts know how much variation exists in the analog world.
I’ll avoid making any definitive statements because like so many people I don’t have the experience of enough different tape machines, running enough different formulations of tape at enough speeds to have an opinion I’d trust. If you want access to a well set up, top quality tape machine, use one of the excellent plugins available.
– Production Expert Editorial Team, Let’s Stop Kidding Ourselves About Tape Plugins
The Calibration Mistake That Makes Buying a Real Tape Machine a Money Pit
Before you could even think about pressing « record, » you had to calibrate the machine. This involved a tedious process of adjusting bias, equalization (EQ), and levels with test tones to ensure the machine was performing to spec for a specific brand and batch of tape. Get it wrong, and your recording could sound dull, overly bright, or distorted in all the wrong ways. It was a chore, a constant battle to achieve neutrality. The biggest mistake newcomers make when buying a vintage machine is underestimating this. They think they’re buying an effect; they’re actually buying a high-maintenance relationship.
What’s fascinating is how the digital world has co-opted these maintenance parameters and turned them into creative tools. The fight we had for clean, flat response is now a menu of tonal options for you. A plugin doesn’t just emulate a machine; it emulates a *perfectly calibrated* machine, and then lets you « mis-calibrate » it on purpose to shape the sound.
Case Study: The UAD Ampex ATR-102 Plugin
The UAD emulation of the Ampex ATR-102 mastering deck is a prime example of this philosophy. As detailed in reviews of the best tape emulation plugins, it transforms traditional calibration into a tone-shaping playground. You can choose from seven different tape formulations (from the glossy Ampex 456 to the gritty 3M 250), four tape speeds, and various head widths. Want the pronounced low-frequency « head bump » of slower speeds like 7.5 IPS? Just select it. Need the pristine high-frequency clarity of 30 IPS? It’s a click away. Every parameter we used to painstakingly set with a screwdriver—hiss, hum, wow, flutter—is now an adjustable knob. This has democratized access to tape’s character, giving you the creative benefits without the crippling maintenance costs of analog ownership.
The irony is beautiful: the very things that made owning a real tape machine a potential money pit are now the features that make tape plugins so powerful. It’s not about avoiding the « mistake » of mis-calibration anymore; it’s about understanding how to use it as a deliberate aesthetic choice to give your tracks the personality they need.
How Does Limited Track Count Force More Creative Arrangement Decisions?
The modern DAW gives you a practically infinite number of tracks. This sounds like a blessing, but it’s often a curse. It encourages indecision. You can layer 20 guitar parts, 15 vocal harmonies, and 30 synth pads, telling yourself you’ll « fix it in the mix. » This rarely works. The result is a cluttered, unfocused arrangement where nothing has its own space. In the golden era of tape, we didn’t have this luxury. We had 4, 8, or maybe 16 tracks if we were lucky. This limitation wasn’t a technical hurdle; it was a creative filter.
It forced us to make choices upfront. It demanded commitment. When you only have a few tracks, every single part has to count. You have to think about the arrangement as a whole, a sonic puzzle where each piece must fit perfectly. You couldn’t just keep adding layers. You had to decide: what is the most important element in this section? What serves the song? This led to leaner, more powerful arrangements. It also meant committing to sounds. Once you bounced three drum tracks down to one, there was no going back. You couldn’t change the snare level later. This sounds terrifying to a modern producer, but it was liberating. It forced you to get the sound right from the source and move on.

This act of physical commitment—literally moving a fader and printing your decision to tape—is a discipline that has been lost. It’s about making a decision and trusting your instincts. The « no-undo » mindset encourages focused performances and the acceptance of tiny imperfections as character, not as flaws to be endlessly polished away into sterility. Reintroducing this discipline, even artificially in a DAW, can fundamentally change how you write and record music.
Why Having Only 4 Tracks Forced Better Arrangement Decisions in the 60s?
If 16 tracks felt limiting, imagine working with just four. This was the reality for many of the most iconic albums of the 1960s. This severe constraint wasn’t just a filter; it was the primary force shaping the production itself. It necessitated a technique called « bouncing » or « ping-ponging, » where you would record three tracks (say, drums, bass, and rhythm guitar), mix them together, and record that submix onto the single remaining open track. This freed up the original three tracks for new overdubs. It was a high-wire act.
This process had two profound effects. First, it forced musicians to think like producers during the performance. They knew that once their parts were bounced, they couldn’t be changed. This created a powerful incentive to play parts that already worked together perfectly, both in terms of rhythm and frequency. It’s a concept called « arranging for the hole »—consciously leaving sonic space for the next instrument that would be overdubbed. Second, the bouncing process itself contributed to the « sonic glue. » Each pass added another layer of tape saturation, compression, and even subtle crosstalk, where sound from one track would bleed onto an adjacent one. These « flaws » helped meld the individual elements into a cohesive whole that is difficult to replicate with isolated digital tracks.
Case Study: The Beatles’ Sgt. Pepper’s Lonely Hearts Club Band
The Beatles and producer George Martin famously used 4-track machines to create the complex masterpiece that is *Sgt. Pepper*. The entire album is a testament to the power of commitment and creative bouncing. This constraint-driven methodology forced them to compose sonic puzzles, ensuring every element had a purpose and a place. The natural cohesion that arose from track bleed and generational loss during bouncing is a huge part of that album’s legendary sound, a process almost impossible to replicate without deliberate, careful processing in the digital realm.
Even today, producers who rediscover this workflow are struck by its efficiency and creative power. As one modern user on the Gearspace forum noted after working with a 4-track, the commitment pays immediate dividends. A user on a Gearspace forum confirmed, « The fact that we have to make a decision there and then and commit to it in order to move forward is making things unbelievably faster, and definitely more productive… And the end product sounds awesome already, because it has to. »
Key Takeaways
- True tape saturation is about adding musically related harmonics that enrich the sound, not just creating generic distortion.
- Noise and hiss are not flaws; they are textural elements that provide a « sonic floor, » fighting the unnatural silence of digital recording and adding a sense of life.
- Creative limitations, especially a low track count, are a powerful filter that forces stronger arrangement decisions, commitment, and a focus on what truly serves the song.
Why a Giant Metal Sheet Creates the Smoothest Vocal Reverb Tail?
While we’re talking about the physical sounds of the past, we have to mention plate reverb. It was a cornerstone of the sound of the 60s and 70s, and its lush, dense character is inseparable from the idea of « warmth. » A plate reverb is exactly what it sounds like: a huge, thin sheet of steel (often 6×4 feet) suspended in a wooden box. A transducer (a « driver ») vibrates the plate with the audio signal, and one or two pickups capture the resulting vibrations, which are then blended back in with the dry signal.
The magic of the plate is its incredible echo density. Unlike a natural room or a spring reverb, which have distinct early reflections you can almost hear individually, a plate’s vibrations are incredibly complex and diffuse. In fact, according to psychoacoustic research on reverb perception, a plate reverb produces echoes so close together that our brains cannot pick out early reflections. Instead, we perceive it as one continuous, smooth wash of sound. This high diffusion is what makes it so perfect for vocals and snares. It adds a beautiful sense of space and sustain without muddying the original signal or creating an obvious « room » sound.
The sound is bright, shimmering, and has a way of blooming after the initial sound that feels incredibly musical. It’s another example of a purely physical process creating a sound that is difficult to model perfectly. The specific tension of the steel, the position of the dampers used to control decay time, and the character of the pickups all contributed to the unique voice of each individual unit. It’s the sound of a physical object singing in sympathy with the music.
How to Build a DIY Echo Chamber to Replicate the Sound of the 60s?
Before expensive plates and long before digital reverb, there was the echo chamber. This was the most physical effect of all: a dedicated, highly reflective room (often in the basement of the studio) with a speaker at one end and a microphone at the other. You would send a signal—a vocal, a snare hit, a guitar—out to the speaker, and record the sound of the reverberant room back onto a new track on the tape machine. This is the sound you hear on countless records from Sun Studios to Capitol Records.
The beauty of this technique is that every chamber was unique. The size of the room, the material of the walls (tile and concrete were favorites), and the placement of the speaker and microphone all defined its character. You can replicate this exact technique today with a method called « re-amping. » You don’t need a perfectly designed chamber; any reverberant space will do. A tiled bathroom, a concrete stairwell, or an empty garage can become your personal echo chamber.
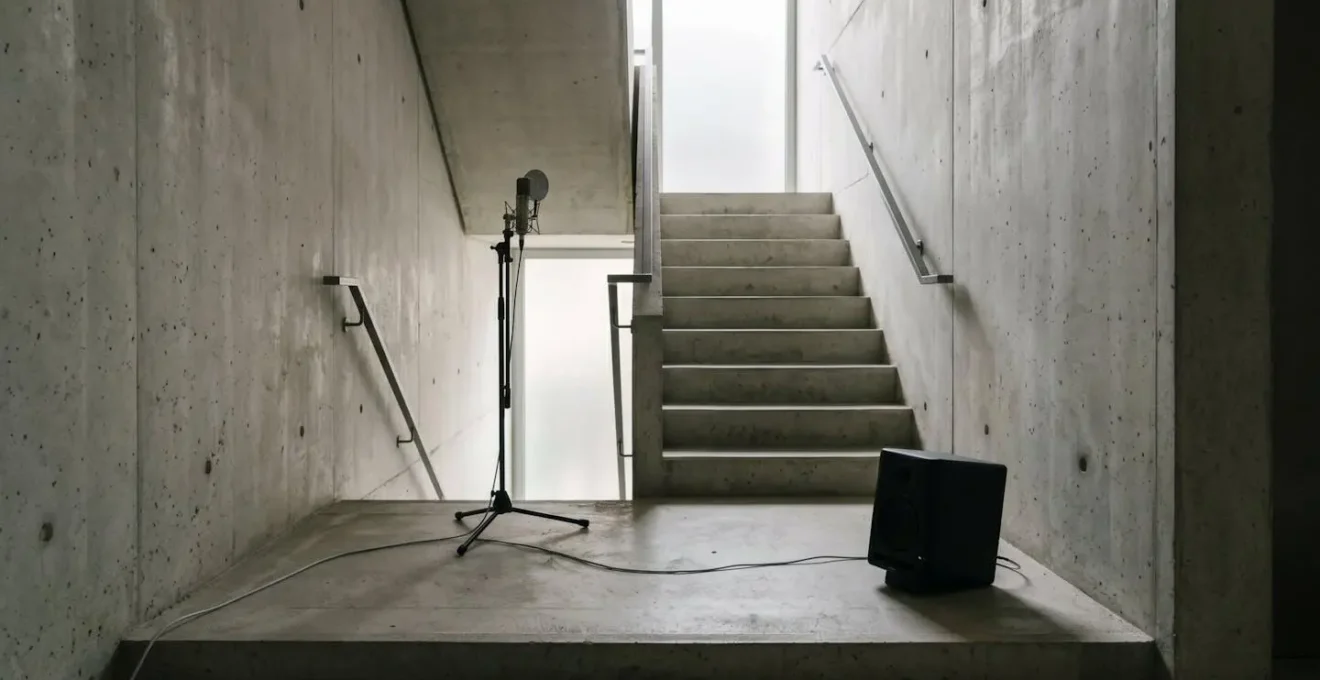
The process is simple and incredibly rewarding. You route your dry audio out of your interface to a speaker (a studio monitor or even a guitar amp works well) placed in your chosen space. Aim the speaker at a wall or corner to maximize reflections. Then, place a microphone some feet away, experimenting with the position to find the sweet spot that balances the direct sound from the speaker with the room’s reflections. Record that microphone’s signal back into your DAW on a new track. What you capture is a 100% unique, organic reverb that has the character of your space and your gear. It’s the ultimate expression of the analog philosophy: using the physical world to create texture and depth.
Now that you understand the philosophy, stop chasing presets. Start applying these principles—one track at a time—and listen for the soul to return to your music. Embrace the hiss, commit to your decisions, and let the beautiful imperfections of the physical world breathe life back into your digital creations.