Authentic ’60s sound isn’t found in a plugin; it’s built by physically manipulating space and mechanics.
- The key is not digital emulation but understanding the « acoustic footprint » of real-world objects like metal sheets, springs, and stairwells.
- Iconic effects like plate reverb, spring « drip, » and slapback delay are the direct result of tangible physics, not algorithms.
Recommendation: Stop chasing presets and start thinking like an acoustic architect—use your environment and hands-on techniques to create truly unique, vintage spatial effects.
The quest for that warm, dimensional, and slightly imperfect sound of the 1960s often leads producers down a digital rabbit hole. We scroll through endless VST plugins, each promising the « perfect » emulation of a vintage plate or a classic spring tank. We tweak digital parameters, hoping to stumble upon that magical combination that transports a dry vocal or a flat guitar into a three-dimensional space. But this approach often misses the fundamental truth of that era’s sound: it wasn’t an emulation. It was a physical reality, a direct result of sound interacting with tangible objects and architectural spaces.
The secret isn’t in finding the right software, but in understanding the original hardware’s soul—its physical principles. What if the key to unlocking that vintage magic wasn’t about recreating the sound, but about recreating the conditions that produced it? This is the core of sonic architecture. It’s an experimental, hands-on philosophy that views reverb and delay not as effects to be applied, but as physical spaces to be built and captured. It’s about the mechanical resonance of a vibrating metal sheet, the tactile splash of a jostled spring, and the unique acoustic footprint of an empty stairwell.
This guide abandons the digital crutch to explore the lost art of physical space creation. We will dissect how a giant metal sheet generates reverb, how to achieve the perfect surf guitar « drip, » and why your drum mix might be suffering from a common decay mistake. By the end, you won’t just be a producer; you’ll be an acoustic architect, capable of building your own echo chambers and designing soundscapes with a tangible, authentic depth that no algorithm can truly replicate.
This article provides a blueprint for becoming a true sonic architect. Explore the physical principles behind iconic sounds, from the mechanics of a plate reverb to the acoustic chaos of a psychedelic soundscape, and learn to build space into your mix.
Summary: How to Build a DIY Echo Chamber to Replicate the Sound of the 60s?
- Why a Giant Metal Sheet Creates the Smoothest Vocal Reverb Tail?
- How to Use Spring Reverb « Drip » for Surf Guitar Tones?
- 50ms or 100ms: Which Delay Time Creates the Perfect Rockabilly Slapback?
- The Reverb Decay Mistake That Washes Out Your Drum Mix
- How to Record Drums in a Stairwell for a Bonham-Esque Ambience?
- How to Order Phaser, Delay, and Reverb Pedals for Maximum Space?
- How to Treat Your Room Reflections to Hear the Album as the Artist Intended?
- How to Design a Psychedelic Soundscape That Transports the Listener Without Using Drugs?
Why a Giant Metal Sheet Creates the Smoothest Vocal Reverb Tail?
The plate reverb is the pinnacle of electromechanical ambiance, renowned for its dense, smooth, and shimmering decay that digital models still struggle to replicate perfectly. The secret isn’t code; it’s physics. A plate reverb is, quite literally, a large, thin sheet of steel suspended in a frame under high tension. A transducer (the « driver ») injects the dry audio signal into the plate, causing it to vibrate. These vibrations travel across the surface of the steel like ripples in a pond. One or more contact microphones are placed on the plate to capture this complex, vibrating sound, which is then blended back into the mix. This is mechanical resonance in its purest form.
What makes it so smooth? Unlike a real room with discrete early reflections, the high density of steel allows for an incredibly diffuse and complex pattern of vibrations. The sound doesn’t just bounce; it propagates through the material itself, creating a reverb tail that is statistically very randomized and free of the harsh « flutter » echoes that can plague small, reflective rooms. The result is a sound that is both massive and unobtrusive, adding a dreamy halo to vocals without muddying the original performance. Professional specifications show that a well-tuned plate can achieve a reverb decay of over 5 seconds at 500 Hz, a testament to its efficiency in storing and releasing sonic energy.
Building one is a true exercise in sonic architecture. Here are the fundamental steps:
- Source the Plate: Find a steel sheet approximately 1 by 2 meters. The type of steel matters; regular steel offers a classic smooth reverb, while stainless steel can provide more consistency.
- Build the Frame: Construct a sturdy tubular steel frame to hold the plate under immense tension, with reinforcement beams to prevent bowing.
- Reinforce and Mount: Spot-weld triangular pieces to the plate’s corners to handle the tension and drill mounting holes.
- Install Transducers: Mount a drive transducer to excite the plate and attach one or two contact microphones to capture the reverberations.
- Tune by Ear: This is the art. Tighten the suspension points to tune the plate’s tension. Listen for and eliminate any flutter or undesirable resonant peaks until the decay is smooth and even.
How to Use Spring Reverb « Drip » for Surf Guitar Tones?
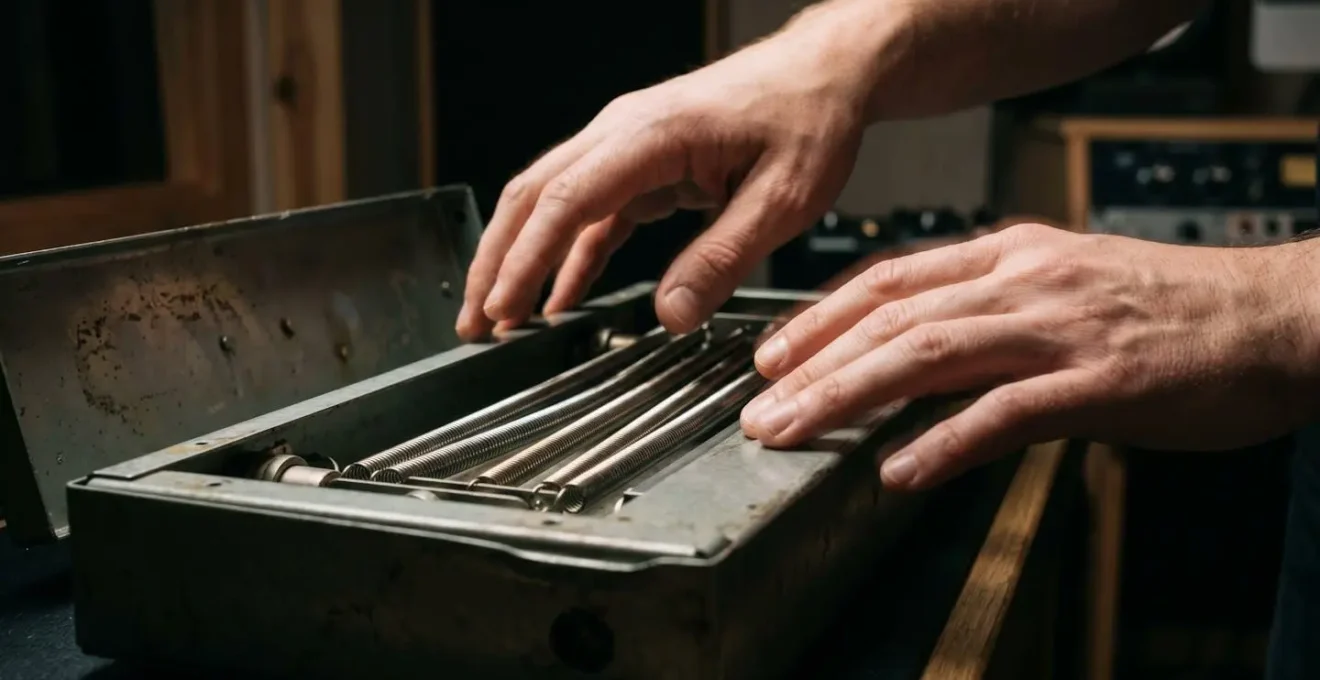
If plate reverb is the sound of a heavenly choir, spring reverb is the sound of a rattling, splashing, chaotic sonic machine. Its signature « drip »—that chirpy, percussive splash of sound that precedes the reverb tail—is the absolute cornerstone of vintage surf and spy-fi guitar tones. This sound is not an elegant diffusion of energy; it’s a brute-force mechanical event. A spring reverb unit works by sending an audio signal through a transducer that shakes a set of coiled metal springs. At the other end, a pickup converts the spring’s vibrations back into an electrical signal. The « drip » is the sound of the initial transient hitting the springs so hard that they create a torsional shockwave, a metallic « boing » that is as much a part of the rhythm as the guitar itself.
This effect is impossible to perfectly replicate digitally because it’s an artifact of physical imperfection. The beauty is in the chaos. As explained by the experts, the goal was to evoke a very specific, tangible image. The « boingy, wet qualities » of the effect were no accident.
The drippy, boingy, wet qualities of the spring reverb evoked the sound of the ocean and crashing waves for the early progenitors of surf rock
– Reverb News Editorial, Secrets of the Surf Guitar Sound
To harness this effect, you must embrace its physicality. Don’t just plug in; interact with it. The amount of « drip » is directly proportional to how hard you attack the guitar strings. A light touch will produce a gentle shimmer, but a hard, percussive pick attack will send that shockwave down the springs, creating the iconic splash. It’s a dynamic and tactile sound, where the player’s performance directly modulates the character of the reverb. The goal isn’t smooth ambience; it’s to make the reverb a percussive, rhythmic element of the song.

This close-up view of a reverb tank’s interior reveals the elegant brutality of the mechanism. The tightly wound springs are the heart of the sound, waiting to be excited into their characteristic, splashy chaos. Understanding this mechanical nature is key to mastering the iconic surf tone.
50ms or 100ms: Which Delay Time Creates the Perfect Rockabilly Slapback?
Slapback echo is the sound of early rock and roll. It’s that quick, single, discrete repeat that gives vocals and guitars a sense of life, dimension, and swagger without washing them out in a long reverb tail. This effect was born from the happy accidents of early tape recording, where the distance between the record and playback heads on a tape machine created a natural, short delay. The key to authentic slapback isn’t just a short delay time; it’s the right short delay time, with virtually zero feedback or repeats. The goal is a single, clear echo that mimics the sound of a voice bouncing off a single close wall.
The difference between 50ms and 100ms is not trivial; it’s the difference between a tight, country-style « slap » and a more spacious, classic rockabilly « echo. » At 50-75ms, the delay is so short that it almost merges with the original signal, creating a thickening effect perfect for fast chicken-pickin’ guitar runs. It adds punch and presence without being perceived as a distinct echo. However, the sweet spot for that quintessential rockabilly sound—think early Sun Studio recordings—lies in the 75ms to 100ms range. This is long enough for the ear to perceive the repeat as a separate event, creating a rhythmic « bounce » that propels the track forward.
Choosing the correct timing is an act of sonic architecture, defining the virtual « room size » for your instrument. This following guide breaks down how delay timing creates distinct stylistic effects. A comparative analysis of delay timings provides a clear roadmap for dialing in these vintage tones.
| Delay Time Range | Musical Effect | Best Application | Feedback Setting |
|---|---|---|---|
| 50-75ms | Tight Country & Western slap | Fast chicken-pickin’ runs | 0% (single repeat) |
| 75-100ms | Classic rockabilly slapback | Rhythm guitar and vocals | 0-10% (minimal) |
| 100-140ms | Sun Studio tape echo style | Elvis-era rock’n’roll tone | 0% (single repeat) |
| 150-200ms | Longer vintage slapback | Slower tempo songs | 10-15% (slight tail) |
The final crucial element is feedback, or repeats. For authentic slapback, the feedback should be set at or near zero. You want one echo, and one echo only. Any more than that, and you’re moving out of rockabilly territory and into modern delay effects. The magic is in the simplicity and the precise timing.
The Reverb Decay Mistake That Washes Out Your Drum Mix
One of the most common mixing errors is treating drum reverb with a « set it and forget it » mentality. You find a nice-sounding room or plate, send the snare and maybe the toms to it, and call it a day. The result? A muddy, washed-out drum mix where the reverb tail from one hit bleeds into the transient of the next, destroying rhythmic clarity and low-end punch. The biggest mistake is letting the reverb’s decay time and frequency content run wild. A long, booming reverb on a kick drum might sound impressive in solo, but in a dense mix, it’s just a recipe for a cloudy, undefined bottom end. The acoustic footprint of your reverb is clashing with the rhythm of your song.
The solution is to think like an architect sculpting a space, not just applying an effect. You need to control the reverb’s size, shape, and duration with surgical precision. The goal is to create a sense of space that enhances the drums without competing with them. This involves pre-emptive EQ, careful timing, and even using the drums’ own dynamics to control the reverb itself. It’s about creating pockets of air for the reverb to breathe in, right after the initial drum transient has done its job.
By treating the reverb send, not just the source sound, you can carve out the perfect space for your drums to live in. This prevents the common problem of reverb « wash » and maintains the power and clarity of your drum mix. It’s a proactive approach to creating space, ensuring every element has its place.
Action plan: Professional Drum Reverb Cleanup Techniques
- Filter the Send: Use a high-pass filter on the reverb send itself, cutting everything below 80-150Hz. This is a critical move to keep the kick and low toms from turning the reverb tail into a muddy rumble.
- Set the Pre-Delay: Introduce a pre-delay of 20-40ms. This creates a small gap between the dry drum hit and the start of the reverb, allowing the initial transient (the « crack » of the snare) to cut through the mix with full impact before the ambient wash begins.
- Time the Decay: The reverb’s decay must be timed to the song’s tempo. The tail of one snare hit should fade out completely before the next one strikes. This maintains rhythmic integrity and prevents the groove from feeling sluggish.
- Use Sidechain Compression: For ultimate control, route the reverb to a compressor and use the dry drum track as the sidechain trigger. This automatically ducks the reverb’s level the instant a drum hits, and then lets it swell back up in the silence between hits, creating a dynamic « pumping » ambience.
How to Record Drums in a Stairwell for a Bonham-Esque Ambience?
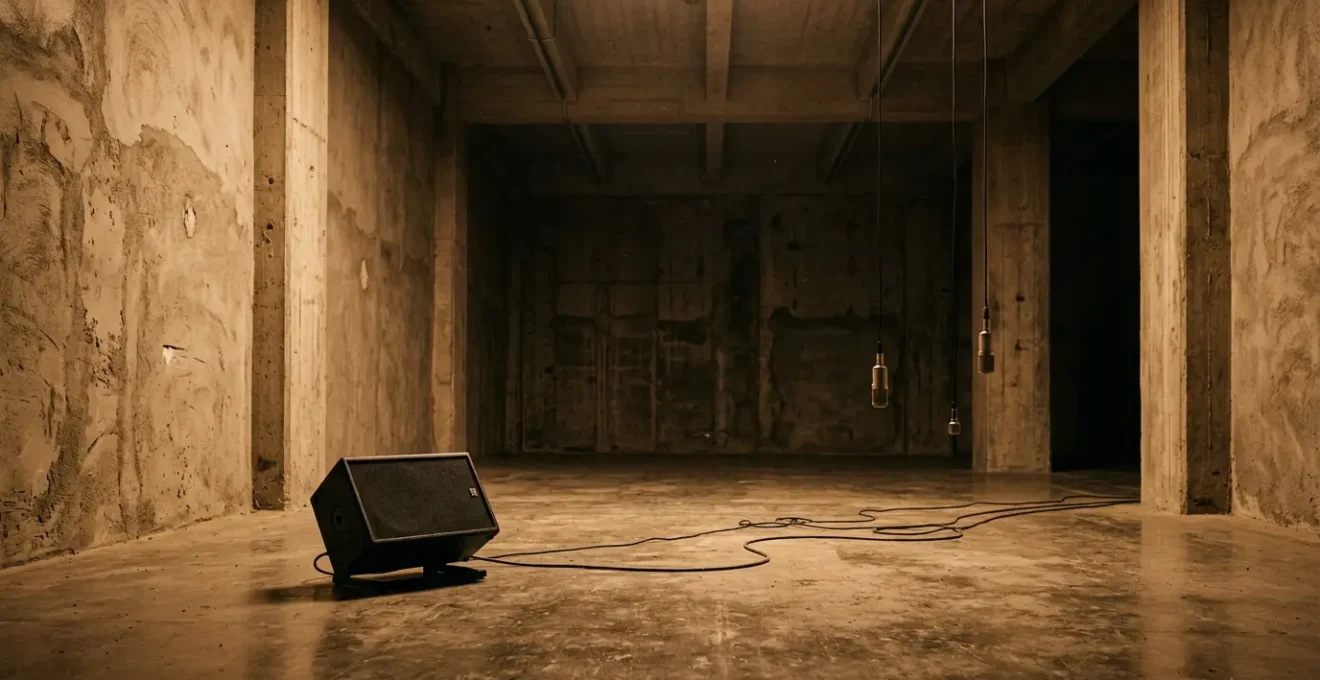
The legendary drum sound of John Bonham on Led Zeppelin’s « When the Levee Breaks » is an icon of sonic architecture. It wasn’t created with a reverb unit; it was captured by recording the acoustic footprint of a physical space. The drums were set up in the lobby of a three-story staircase, with microphones placed two stories up to capture the massive, cavernous, and complex natural reverberation of the hall. This is the ultimate DIY echo chamber: using the world around you as your greatest effects processor.
You can replicate this technique without booking Headley Grange. Any space with hard, reflective surfaces and interesting geometry can become a natural echo chamber. A concrete stairwell, an empty garage, a tiled bathroom, or a long hallway can all provide a unique sonic character that is impossible to fake with a plugin. The key is to experiment with microphone placement to find the « sweet spot » where the balance of direct sound and reflected sound is most pleasing. This isn’t about close-miking; it’s about capturing the sound of the room itself.
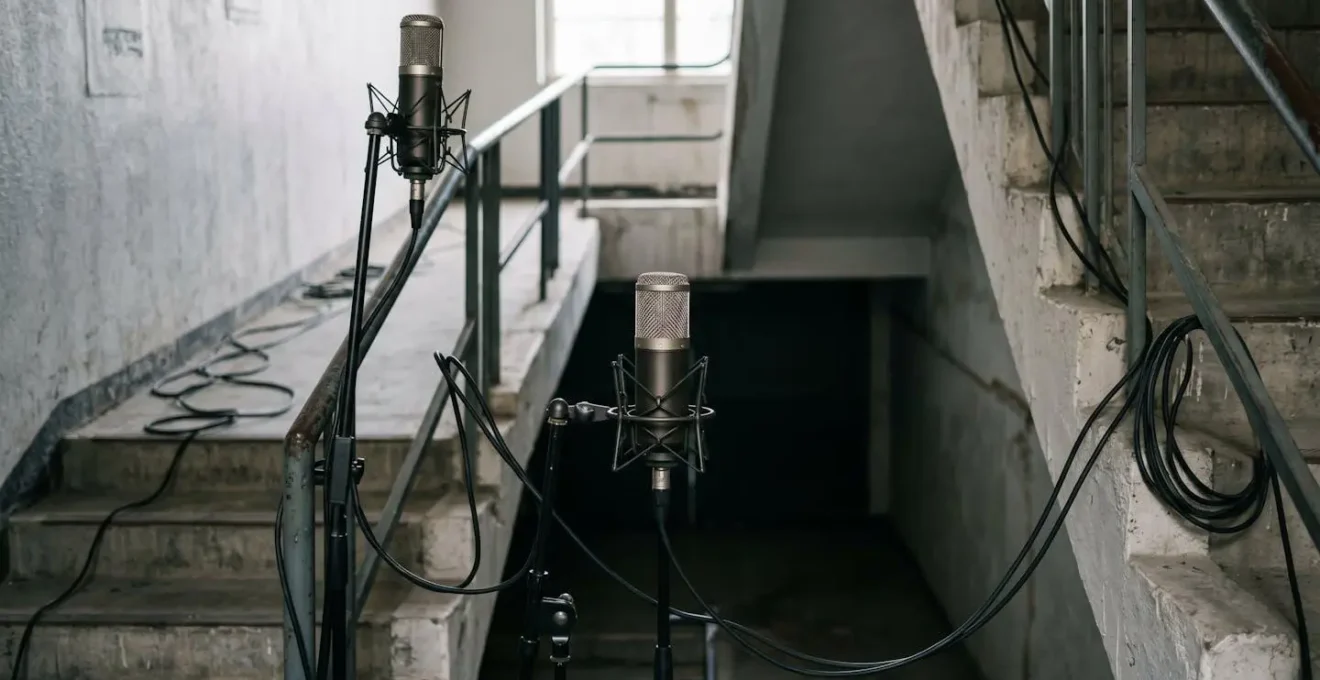
The real art of this technique, often called « worldizing, » is to blend this captured room sound back in with a set of dry, close-miked drum tracks. This gives you the best of both worlds: the punch and clarity of the close mics and the epic, authentic ambience of the real space. This is a powerful technique for creating space without digital artifacts, as demonstrated in a case study where an engineer used a similar method in an empty shed. An engineer fed a dry drum signal through a loudspeaker into a reverberant space, capturing the reflections to mix with the original, achieving an authentic spatial dimension.
Case Study: Natural Echo Chamber Recording
An engineer utilized a 100 square meter empty shed as a natural echo chamber. Instead of placing the drums inside, they placed a loudspeaker and microphones. The dry drum signal was fed through the speaker, exciting the reverberant space. The reflected sound was captured by the microphones and then mixed subtly with the original dry recording, resulting in an authentic spatial dimension that felt completely integrated with the performance.
How to Order Phaser, Delay, and Reverb Pedals for Maximum Space?
Once you start combining time-based and modulation effects, the order in which you chain them—the signal path architecture—becomes critically important. Placing a phaser before a delay sounds radically different than placing it after. There is no single « correct » order; there are only different architectural choices that yield different sonic results. Understanding these choices allows you to build complex, three-dimensional soundscapes with intention.
The conventional wisdom for achieving maximum clarity and a clean, defined sense of space is to place effects in an order that mimics how sound behaves in the real world: Modulation → Delay → Reverb. In this setup (Phaser → Delay → Reverb), you are modulating the dry signal first, then creating echoes of that modulated sound, and finally placing all of those echoes within a larger ambient space. This results in clear, distinct repeats that have a sense of movement, all housed within a cohesive reverb. It’s logical, clean, and works perfectly for classic rock and ambient tones where clarity is key.
However, the goal of a sonic architect is not always to be conventional. Reversing the chain can lead to beautifully chaotic and unpredictable textures. Placing reverb first (Reverb → Delay → Phaser) means you are creating echoes of a reverberant signal, and then modulating the entire wet, smeary mess. This can easily turn to mud, but for psychedelic or shoegaze textures, this swirling, indistinct wash is exactly the desired effect. It’s less about creating space and more about creating a dense, evolving sonic fog. The following table compares different routing strategies, highlighting the vast difference a simple change in order can make.
| Chain Order | Sonic Result | Best For | Pros/Cons |
|---|---|---|---|
| Phaser → Delay → Reverb | Clean, clear spatial separation | Classic rock, ambient clarity | Preserves dynamics / Less experimental |
| Reverb → Delay → Phaser | Swirling, indistinct dreamy wash | Psychedelic, shoegaze textures | Unique character / Can be muddy |
| Delay → Phaser → Reverb | Modulated repeats with space | Lead tones with movement | Interesting motion / Complex to dial in |
| Parallel chain split | Simultaneous dry and wet signals | Maximum width and control | Ultimate flexibility / Requires mixer pedal |
How to Treat Your Room Reflections to Hear the Album as the Artist Intended?
The most important echo chamber you own is the one you’re sitting in right now: your listening room. Before you can accurately build or mix spatial effects, you must first control the unwanted acoustic footprint of your own environment. An untreated room with parallel walls and hard surfaces is a funhouse of chaotic reflections, flutter echoes, and standing waves. These uncontrolled reflections smear your stereo image, create false frequency buildups, and completely mask the subtle details of reverb tails and delay repeats in your mix. You’re not hearing the album as the artist intended; you’re hearing the album plus the chaotic signature of your room.
Acoustic treatment is the process of neutralizing your room’s sonic signature so you can hear your music accurately. This doesn’t mean creating a « dead » space completely free of reflections. It means striking a balance between absorption and diffusion. Absorption, typically achieved with thick broadband panels made from materials like Rockwool, traps sound energy to tame flutter echo and reduce decay times. Diffusion, achieved with surfaces of varying depths (like a bookshelf full of books or a purpose-built quadratic diffuser), scatters sound energy to break up harsh reflections while keeping a sense of life and air in the room.
Even on a tight budget, a few strategic moves can dramatically improve your listening accuracy. The goal is to tackle the « first reflection points »—the spots on your side walls, ceiling, and back wall where sound from your speakers bounces once before reaching your ears. Taming these early reflections is the single most effective way to improve stereo imaging and clarity. A few DIY panels and intelligent positioning can transform a chaotic room into a trustworthy listening environment. You can follow some professional tips to build your own acoustic treatment on a budget.
Here’s a practical method for treating your room:
- Find First Reflection Points: Use the « Mirror Trick. » Sit in your listening position and have a friend slide a mirror along the side walls. Wherever you can see the reflection of a speaker, that’s a first reflection point. Mark it and place an absorption panel there.
- Apply the 38% Rule: For optimal bass response, try placing your listening chair 38% of the way into the room’s length, measured from the front wall.
- Balance Absorption and Diffusion: Don’t cover every surface with absorbers. This will create an unnaturally dead-sounding room. Use absorption at first reflection points and bass traps in corners, but use things like bookshelves on other walls to diffuse sound and keep the room « live. »
Key takeaways
- Authentic vintage ambience comes from understanding and manipulating physical space, not just from digital emulation.
- The unique character of effects like plate reverb (diffuse), spring reverb (splashy), and tape slapback (discrete) are direct results of their mechanical construction.
- Your listening environment and your effects chain order are both forms of sonic architecture that must be controlled with intention to achieve a professional result.
How to Design a Psychedelic Soundscape That Transports the Listener Without Using Drugs?
Designing a truly psychedelic soundscape is the ultimate test for a sonic architect. It’s about more than just applying a flanger and a long delay; it’s about deconstructing the listener’s sense of reality and creating an immersive, otherworldly environment. This is achieved by bending the rules of physics, manipulating time, and creating sounds that feel both alien and deeply organic. The key is to use these mechanical, physical techniques we’ve discussed, but push them to their absolute breaking points.
This means embracing feedback, generating self-oscillation in a delay pedal until it becomes a screaming siren. It means physically striking, scraping, or « playing » a spring reverb tank to create thunderous crashes and metallic shrieks—a form of tactile sound design. It involves re-amping signals into strange physical spaces, a technique called « worldizing, » to give them an unmatchably realistic, yet bizarre, acoustic footprint. As one case study shows, feeding a signal into a tiled bathroom and re-recording the natural reverberation creates an effect that binds the sound to a real, physical space in a way digital reverb cannot.
A truly transportive soundscape is built on layers of these physical interactions. It might start with a guitar signal running through a reversed effects chain (Reverb → Delay → Phaser) to create a swirling, indistinct foundation. On top of that, you might layer the sound of a tape loop degrading in real-time, or the natural echo of a voice shouted down a long concrete tunnel. It’s about combining multiple, unconventional spatial signatures into a single, cohesive (or cohesively chaotic) whole. The goal is to create a sound world so rich in physical, textural detail that the listener has no choice but to be fully immersed. It’s sonic time travel and world-building, all achieved by manipulating the fundamental physics of sound.
By ceasing to be a mere user of tools and becoming an architect of sound, you unlock a universe of sonic possibilities. The next step is to grab a microphone, find an interesting space, and start building.