In summary:
- Stop fighting for volume; instead, engineer your synth’s unique space in the mix through precise spectral and temporal design.
- The punch of a synth isn’t just its attack speed, but its micro-temporal signature—how it holds and decays in the first milliseconds.
- Carve out a dedicated frequency home for your synth using steep filters, especially in the 250-800Hz range, to avoid clashing with bass and guitars.
- Use manual sync methods like tap tempo and dynamic modulation (LFOs, envelopes) to create sounds that feel alive and responsive within a live band context.
You’ve dialed in the perfect preset. It sounds massive on its own. But the moment the drummer counts in and the guitarist hits a power chord, your synth vanishes, buried under a tidal wave of distortion. It’s a familiar frustration for keyboard players in the rock world. The common advice—turn up, use distortion, cut some lows—is a blunt instrument in a sonic war that requires surgical precision. You’re not just competing for volume; you’re competing for a slice of the frequency spectrum and a moment in time.
The electric guitar, especially when distorted, is a formidable sonic entity, flooding the critical midrange (from 200Hz to 5kHz) with complex harmonics. Trying to muscle your way through this dense wall is a losing battle. The conventional approach of basic EQ and layering often just adds to the mud, a phenomenon known as harmonic collision. But what if the solution isn’t about being louder, but being smarter? What if you could treat your synthesizer not as an instrument to be played, but as a system to be engineered?
The true key lies in a paradigm shift: from simply choosing sounds to actively designing them with spectral architecture and temporal precision. This is the science of building patches that don’t just fit into a mix, but strategically command their own unique and unassailable domain. It involves a deep understanding of how a sound behaves in milliseconds and across the frequency spectrum. This guide will deconstruct the physics and psychoacoustics of sound design, providing you with the technical framework to craft synth patches that slice through the heaviest of rock mixes, transforming you from a player lost in the noise to the sonic architect of your band’s sound.
This article will guide you through the core engineering principles for crafting synth patches that not only survive but thrive in a dense rock mix. The following table of contents outlines our journey from foundational rhythm programming to complex atmospheric design.
Summary: A Synthesist’s Engineering Manual for Rock Dominance
- Why a Fast Attack is Crucial for Rhythmic Synth Bass Lines?
- Lead or Pad: When to Use Mono Mode for Expressive Synth Solos?
- How to Sync Your Arpeggiator to the Drummer Live Without MIDI Clock Issues?
- The Filter Mistake That Clashes With the Bass Guitar’s Low End
- When to Open the Cutoff Filter to Build Tension Before a Chorus?
- How to Integrate Sub-Bass Synths into Hard Rock Without Muddying the Kick Drum?
- How to Turn Metal Clanging Sounds into a Playable Drum Kit?
- How to Design a Psychedelic Soundscape That Transports the Listener Without Using Drugs?
Why a Fast Attack is Crucial for Rhythmic Synth Bass Lines?
In a rhythmic context, a synth’s ability to cut through is defined by its temporal signature—its unique fingerprint in time. For a synth bass line to lock in with a live drummer, the initial transient is everything. A fast attack on your volume envelope ensures the sound achieves full power almost instantly, aligning perfectly with the kick drum’s initial impact. This creates a unified, powerful low-end foundation rather than a sluggish, lagging feel. However, « fast » isn’t just about setting the attack time to zero. The real punch comes from the micro-details that follow.
An analysis of the classic Minimoog’s signature punchy sound reveals a crucial secret: the signal holds at maximum level for approximately 20-30ms after the attack before the decay phase begins. This « hold » stage, even if brief, creates a perceived percussive weight that helps the note maintain its presence in a dense mix. You can replicate this effect on modern synthesizers by using an envelope generator with a dedicated hold parameter or by programming a multi-stage envelope where the first stage after the attack has a level of 100% for a short duration.
The goal is to create a sharp, defined start to the note that is both heard and felt. According to research on envelope timing, an attack time between 0ms and 10ms is optimal for synth bass clarity against a kick drum. Anything longer can cause the synth’s transient to be masked by the drum, resulting in a loss of definition. By engineering this precise temporal signature, you’re not just playing a note; you’re launching a sonic projectile designed for maximum rhythmic impact.
Lead or Pad: When to Use Mono Mode for Expressive Synth Solos?
For a synth lead to soar above a wall of guitars, it must mimic the characteristics of a lead instrument, not a chordal one. This is where monophonic mode becomes an essential strategic tool. Engaging mono mode limits the synthesizer to producing only one note at a time, preventing the accidental triggering of polyphonic tones that can quickly muddy the sonic space during a fast solo. More importantly, it unlocks expressive performance techniques like legato and portamento, which are fundamental to emulating the nuances of a guitar solo.
When legato is enabled in mono mode, playing a new note while another is held down will change the pitch without re-triggering the filter or volume envelopes. This creates a smooth, fluid transition between notes, much like a guitarist’s hammer-on or pull-off. By carefully setting the portamento or glide time, you can create seamless slides between notes, adding a vocal quality to your phrasing. This level of expressive control is what separates a static synth line from a dynamic, attention-grabbing solo.

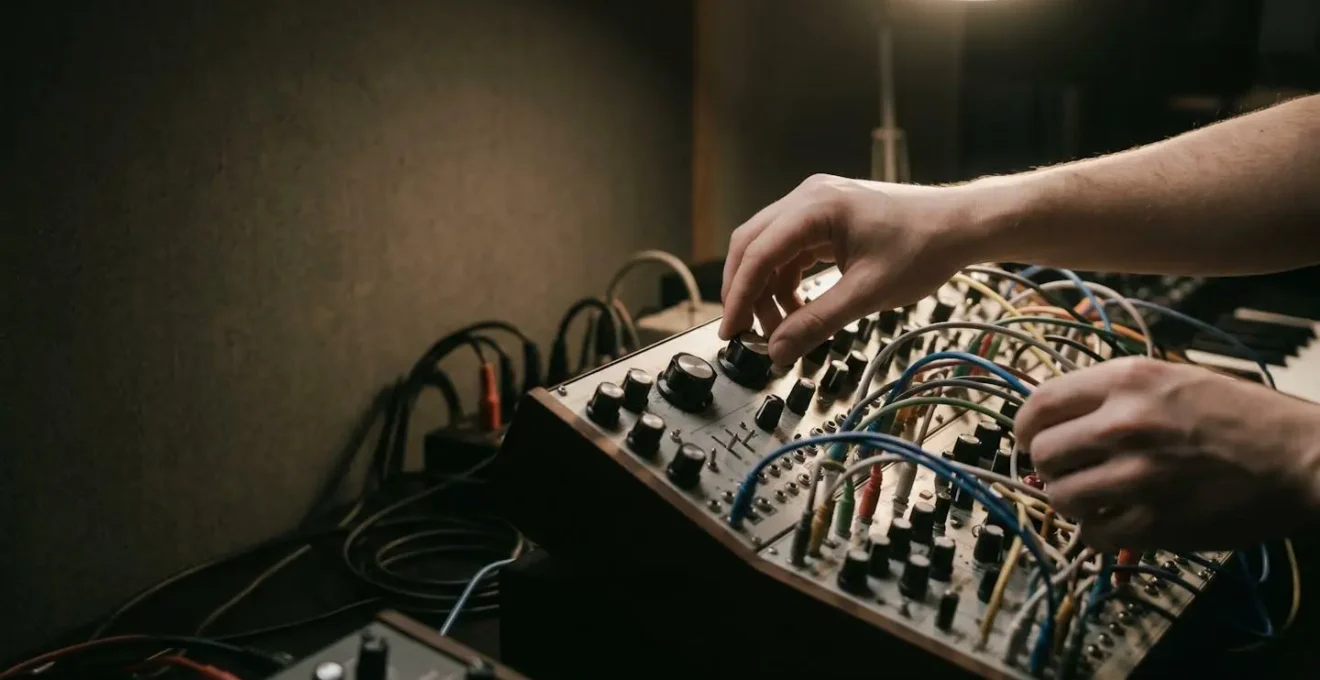
As you can see in the focused technique above, the physical act of playing legato on a keyboard becomes a conduit for expression. The choice of note priority (Last Note vs. Low Note) further refines this control, determining which note takes precedence when you play overlapping keys. Mastering these settings transforms the synthesizer from a simple sound generator into a highly responsive solo instrument, capable of delivering the emotional impact needed to stand out.
Action Plan: Configuring Monophonic Legato for Expressive Solos
- Enable monophonic mode on your synthesizer to limit output to one voice at a time.
- Activate legato settings to change pitch without re-triggering the attack envelope for smooth transitions.
- Set portamento time between 20-100ms to create smooth pitch slides resembling guitar techniques.
- Configure note priority (e.g., Last Note Priority) to control which note sounds during overlapping playing.
- Practice legato phrasing by holding down one key while playing others to develop a fluid, connected playing style.
How to Sync Your Arpeggiator to the Drummer Live Without MIDI Clock Issues?
The allure of a perfectly synced arpeggiator pulsing in time with a live drummer is powerful, but achieving it is a notorious technical challenge. Standard MIDI Clock is often too rigid for the organic ebb and flow of a human drummer, and modern « smart » solutions can be deceptively unreliable. For example, real-world tests using a dedicated microphone on the kick drum to drive a synthesizer’s envelope follower for tempo sync have proven highly variable. While it may work under ideal studio conditions, the slightest variation in the drummer’s playing can cause the BPM to suddenly halve or lag, leading to performance-destroying inconsistencies.
The professional, road-tested solution is to abandon automated sync and embrace a manual, performance-based approach. The tap tempo method gives the keyboard player full control, allowing them to become the bridge between the synthesizer’s digital precision and the drummer’s human feel. By assigning tap tempo to a foot pedal, you can establish the song’s tempo on the fly, making subtle adjustments as the drummer naturally pushes or pulls the beat. This hands-on method is far more robust than any automated system.
Furthermore, true sync is about more than just tempo; it’s about phase—the alignment of the « one » of the arpeggio with the « one » of the musical bar. To achieve this, the arpeggiator should be configured to trigger on key press, not from a global clock. This allows you to manually re-trigger the arpeggiator’s pattern at the start of each musical phrase by simply lifting and re-pressing your hand. This combination of foot-controlled tempo and hand-controlled phrasing ensures your arpeggios are not just in time, but are musically locked with the band’s groove.
Your Live Arpeggiator Sync Checklist
- Assign Control: Configure your synth’s tap tempo to a foot pedal for hands-free, real-time tempo adjustments during the performance.
- Establish Tempo: Tap the pedal 3-4 times on the drummer’s main beats (e.g., the snare on 2 and 4) at the start of a song to establish the core tempo.
- Set Triggering: Configure the arpeggiator to trigger its sequence on the initial key press, not from an internal or external MIDI clock, to control the downbeat.
- Maintain Phase: Manually re-trigger the arpeggiator at the start of key musical phrases (like a new verse or chorus) by lifting your hands and re-pressing the keys on the downbeat.
- Practice as a Unit: Rehearse this technique with your drummer to develop a feel for how to adjust and re-sync on the fly, making it a part of the performance.
The Filter Mistake That Clashes With the Bass Guitar’s Low End
One of the most common battlegrounds in a rock mix is the low-mid frequency range. When a synth patch has too much energy in this area, it directly competes with the fundamental frequencies of the bass guitar and the body of the electric guitars, creating a muddy, undefined mess. The most prevalent mistake is using a filter that isn’t aggressive enough to create a clean separation. A gentle filter slope simply attenuates these frequencies, allowing them to « bleed » through and continue to cause harmonic collision.
The solution is an act of deliberate spectral architecture: carving out a distinct space for your synth. This requires a high-pass filter with a steep slope, such as 24 dB/octave (also known as a 4-pole filter). This « brick wall » style of filter aggressively removes frequencies below its cutoff point, creating a clean, defined edge for your sound. By setting the cutoff frequency in the critical 250-800Hz range, as audio engineering research indicates, you effectively remove the frequencies that clash most with the bass guitar, allowing both instruments to coexist powerfully in the mix.
The choice of filter slope has a dramatic effect on how cleanly a synth patch separates from other instruments. A steeper slope provides more precise control over the spectral footprint of your sound.
| Filter Slope | Attenuation Rate | Effect on Bass Separation | Best Use Case |
|---|---|---|---|
| 6 dB/octave (1-pole) | Gentle | Insufficient – allows too much low-end bleed | Subtle tone shaping only |
| 12 dB/octave (2-pole) | Moderate | Adequate for most rock applications | General purpose synth filtering |
| 24 dB/octave (4-pole) | Steep ‘brick wall’ | Excellent – clean frequency separation | Dense mixes with bass guitar conflict |
Using a steep 24 dB/octave high-pass filter is a declaration of intent. It tells the mix exactly where your synth’s frequency domain begins and ends, preventing sonic overlap and ensuring that even a « thin » sounding patch can cut through with absolute clarity precisely because it isn’t fighting for space it doesn’t need.
When to Open the Cutoff Filter to Build Tension Before a Chorus?
In sound design, filters are not just for static tone-shaping; they are a primary tool for creating dynamic movement and emotional energy. A classic and highly effective technique for building tension before a song’s chorus is the filter sweep—gradually opening the cutoff frequency of a low-pass filter. As the filter opens, it progressively introduces more high-frequency content, making the sound brighter, more aggressive, and seemingly louder. This crescendo of harmonic energy creates a powerful sense of anticipation, signaling to the listener that a significant change is imminent.
The most effective filter sweeps are synchronized with the musical structure, often beginning four, two, or one bar before the chorus hits. By automating the filter cutoff to rise over this period, you create a sonic « riser » that pulls the listener forward. The rate of the sweep is also crucial; a slow, gradual opening builds a long, simmering tension, while a fast sweep in the final two beats before the drop creates a sudden, exciting rush. Combining this with a slight increase in the filter’s resonance can further accentuate the sweep, adding a « whistling » or « singing » quality that enhances the tension.
Interestingly, a counter-intuitive but equally powerful technique involves using a high-pass filter. Analysis of this method in electronic music reveals that by progressively filtering out the bass frequencies of a synth pad or lead, you create a sense of absence and unease. This capitalizes on a psychoacoustic principle: removing the low-end energy makes the track feel thinner and less grounded, causing listeners to subconsciously anticipate its powerful return. When the chorus arrives and the full frequency range is restored, the impact is magnified, feeling more explosive and satisfying.
How to Integrate Sub-Bass Synths into Hard Rock Without Muddying the Kick Drum?
Integrating a powerful sub-bass synth into a hard rock track can add immense weight and power, but it’s a high-risk maneuver. The primary danger lies in the direct conflict between the sub-bass and the kick drum. Both instruments live in the same foundational frequency range, and mixing analysis demonstrates that the 40-80Hz zone is where this conflict is most intense. When both hit at the same time, the result is not a bigger sound, but a muddy, indistinct rumble that loses all impact. A simple EQ cut is not enough; a dynamic solution is required.
The definitive technique to solve this problem is multiband sidechain compression. This is a surgical approach to spectral architecture that allows the kick drum to momentarily « carve out » space from the sub-bass, but only in the specific frequency band where they clash. Unlike standard sidechain compression, which ducks the entire volume of the synth, this multiband method is far more transparent and powerful.
Here is how the setup works in practice:
- Step 1: Route the kick drum signal to a bus that will act as the sidechain trigger for a multiband compressor placed on the sub-bass track.
- Step 2: On the multiband compressor, isolate the problematic 40-80Hz frequency band. You will only be applying compression to this narrow slice of the sound.
- Step 3: Configure this band’s sidechain input to listen to the kick drum bus. Set a very fast attack time (0.1ms or faster) to ensure the compression engages instantly when the kick hits.
- Step 4: Dial in the compression. A ratio of around 6:1 with about 15dB of gain reduction is a strong starting point. Every time the kick drum hits, the sub-bass’s 40-80Hz range will be momentarily pushed down, creating a perfect pocket for the kick’s transient to punch through without competition. The release time can be tuned to either create an energetic « pumping » effect or a smooth, inaudible ducking.
This technique allows you to have both a thunderous, sustained sub-bass and a tight, punchy kick drum. They are no longer fighting for the same space but are dynamically and intelligently interacting, creating a low end that is both massive and perfectly clear.
How to Turn Metal Clanging Sounds into a Playable Drum Kit?
Creating a unique, playable drum kit from unconventional sounds like metal clangs requires a shift in thinking from « finding a sample » to « constructing a sound. » A raw recording of a metal clang might have an interesting character, but it will likely lack the weight, body, and dynamic response needed for a convincing percussive instrument. The professional approach is to deconstruct the sound into its core components and rebuild it through strategic layering.
A powerful percussive sound is typically made of two main parts: the transient and the body. The transient is the initial, sharp attack that defines the sound’s impact (the « clang » itself). The body is the resonant tone and low-end weight that follows, giving the sound substance (the « thud »). Your metal sample provides the perfect transient, but it’s likely missing the body. The solution is to layer it with a synthesized sound designed specifically to provide that missing low-end weight, such as a classic 808-style sine wave or a heavily filtered square wave.
The quick-attack envelope can be applied to existing parts or added on an additional layer with the sole purpose of adding transient information to the bass that you’re building.
– Waves Audio, Mixing and Layering Synth Bass: Step-By-Step tutorial
The key is that each layer must serve a specific purpose. Don’t just stack sounds indiscriminately. Route the metallic transient and the synthesized body to a dedicated sampler or drum machine. Then, use velocity mapping to control the balance between the layers. For example, you could map velocity so that softer hits trigger more of the synthesized body, while harder hits bring in more of the sharp, metallic transient. Finally, route all layers to a single bus for cohesive processing (like compression and saturation) that « glues » the elements together into a single, unified, and powerful percussive voice.
Key takeaways
- Synth clarity in rock isn’t about volume, but about precise control over a sound’s frequency (spectral) and time (temporal) characteristics.
- Steep filters (24dB/octave) are essential for carving out a clean space for synths, preventing muddy overlap with guitars and bass.
- Dynamic and manual techniques (sidechaining, tap tempo, LFOs) are superior to static settings for creating sounds that feel alive and locked-in with a live band.
How to Design a Psychedelic Soundscape That Transports the Listener Without Using Drugs?
Designing a truly psychedelic soundscape is an exercise in controlled chaos. The goal is to create a sonic environment that feels alive, unpredictable, and constantly evolving, disorienting the listener’s sense of time and space. The key is not random noise, but the intricate modulation of multiple parameters simultaneously, creating textures that never quite repeat. A powerful technique for achieving this is using multiple, independent Low-Frequency Oscillators (LFOs).
Instead of using a single LFO to create a predictable wobble, the advanced approach is to assign several LFOs, all running at different, unsynchronized rates, to various destinations. Use complex LFO shapes like « Sample and Hold » or randomized waveforms to generate unpredictable patterns. One LFO might be slowly modulating the pan position, causing the sound to drift across the stereo field. A second, faster LFO could be subtly modulating the pitch to create a nervous vibrato, while a third, very slow LFO is gently sweeping the filter cutoff. The cumulative effect of these asynchronous modulations is a texture that is in constant, non-repeating motion.
However, pure chaos is just noise. The real psychoacoustic trick is to provide a single, stable element to act as an anchor for the listener. This could be a dead-steady, repetitive bass line or a simple, unchanging drum beat. This contrast is critical: the stability of the anchor element makes the wild modulations of the soundscape feel even more extreme and disorienting. It gives the listener’s brain a reference point to cling to, which paradoxically allows them to let go and be transported by the evolving textures around it. The final touch is generous use of effects like long-tail delays and vast reverbs, which smear the sounds in time and space, completing the immersive, otherworldly experience.
Blueprint for Evolving Textures with Multi-LFO Modulation
- Assign a minimum of 2-3 independent LFOs running at slow, unsynchronized rates to different synth parameters.
- Use complex LFO waveforms like sample-and-hold or randomized shapes to create unpredictable, non-repeating patterns.
- Route these LFOs to modulate pan position, filter cutoff, pitch, and amplitude to create constant, subtle movement.
- Maintain one grounded, repetitive element (like a simple bass line or drum beat) to act as a psychoacoustic anchor for the listener.
- Apply long-tail delays and large reverbs to the modulated soundscape to wash out the sounds and blend them into a cohesive, atmospheric whole.
You have now moved beyond simply choosing presets and have begun to think like a sonic engineer. By mastering the temporal signature of your sounds, architecting their spectral footprint, and embracing dynamic, manual control, you can craft synthesizer patches that don’t just coexist with distorted guitars—they command their own space with intention and clarity. Begin today by applying these engineering principles to your own patches, transforming them from sounds that get lost into sounds that define the mix.