
In summary:
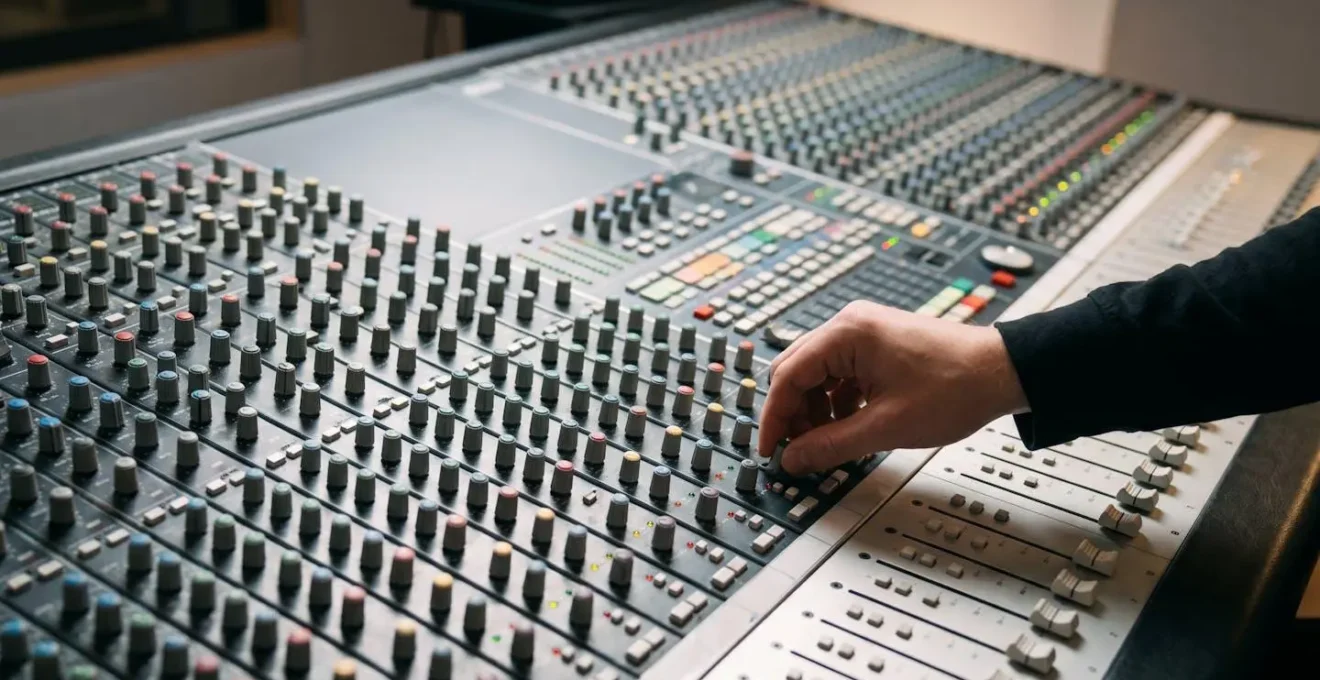
- Treat the mixing desk not as a corrective tool, but as a playable, rhythmic instrument.
- Use manual fader riding to add human emotion and dynamics that compression can’t replicate.
- Employ aux sends and mutes as percussive accents to create dramatic, gestural effects in real-time.
- Leverage analog summing and saturation to build a wide, cohesive, and powerful soundstage.
- Transform static recordings into living performances by « playing » the mix with intuitive, musical movements.
Your mix sounds clean, balanced, and technically perfect. Every track sits in its place, the compression is dialed in, and the levels are steady. Yet, something is missing. The track feels static, trapped inside the grid, lacking the human soul and raw energy that makes rock and dub music breathe. You’ve followed all the digital rules, but the result is a sterile photograph instead of a living, moving piece of art. The digital tools promise precision, but they often strip away the very element you’re trying to capture: feeling.
Many mixers reach for more plugins, more complex automation curves, or dive into esoteric sidechaining techniques. They treat the problem as a technical puzzle to be solved with more processing. But what if the solution isn’t in adding another layer of digital perfection? What if the key is to step back from the mouse and put your hands on the console? The true art of a performance mix lies in a philosophical shift: viewing the mixing desk not as a sterile interface for correction, but as a dynamic, rhythmic instrument in its own right.
This is where the magic of dub and classic rock production comes into play. It’s an approach built on intuition, movement, and what can only be described as sonic alchemy. By treating faders, mutes, and sends as percussive tools, you can inject life, groove, and emotion directly into the recording. This guide will move beyond static settings and explore how to « perform » your mix, transforming the console into an extension of your musical expression. We will explore how manual gestures can beat digital precision, how to create dramatic effects in real-time, and how to build a powerful soundstage that feels alive.
This article provides a complete roadmap for transforming your mixing process. Dive into the sections below to master specific techniques and adopt the mindset of a performance-first mix engineer.
Contents: Performing Your Mix from the Console
- Why Riding the Vocal Fader Manually Beats Digital Compression?
- How to Use Aux Sends to Throw Delays on Specific Snare Hits?
- Digital Summing or Analog Desk: Which One Provides Better Separation?
- The Red-Lining Mistake That Introduces Ugly Digital Distortion
- How to Route External Gear into the Desk for a Hybrid Workflow?
- How to Stack Three-Part Harmonies That Blend Perfectly in the Mix?
- How to Create Controlled Feedback Loops Using a Mixer and Pedals?
- How to Mix Modern Hard Rock to Compete With Pop on Spotify Playlists?
Why Riding the Vocal Fader Manually Beats Digital Compression?
In the world of digital mixing, a compressor is the default tool for taming a dynamic vocal. It’s fast, precise, and consistent. However, that consistency is also its greatest weakness. A compressor is a reactive machine; it can’t anticipate a whisper or a scream. It simply clamps down based on a threshold, often robbing a performance of its natural emotional arc. Manual fader riding, on the other hand, is a proactive, interpretive act. It’s about becoming part of the performance. As one engineer on the Gearspace forums eloquently puts it:
Its your opportunity to add depth and emotion to the record, emphasize certain moments, add some life, some movement, some give and take.
– Gearspace Community Member, Gearspace Forum Discussion on Riding The Fader Vs. Compression
This technique, often called « vocal riding, » allows the engineer to become a conductor. You can gently raise the level of a word at the end of a phrase to enhance its vulnerability, or subtly pull back before a chorus to make the dynamic impact even greater. It’s about enhancing the natural ebb and flow of the singer’s delivery. Unlike a compressor, which can’t tell the difference between a soft, intense line and a genuinely quiet one, your ears can. You can make surgical adjustments that are transparent and feel completely musical because they are driven by human interpretation, not an algorithm.
The goal is to create the console’s breath—a mix that swells and recedes with the song’s energy. This gestural mixing is especially crucial for rock and soul-influenced genres, where the raw emotion of the vocal is paramount. By anticipating volume changes and making adjustments that feel organic, you preserve the singer’s original intent while ensuring every word is heard exactly as it was meant to be felt. The fader becomes your primary tool for storytelling.
How to Use Aux Sends to Throw Delays on Specific Snare Hits?
One of the defining sounds of dub and psychedelic rock is the « delay throw »—a sudden, dramatic echo that appears on a single word or drum hit and then vanishes. This isn’t a constant, background effect; it’s a form of rhythmic punctuation. It’s a live, performance-based move that adds explosive energy and dimension. The aux send on your console is the key to this technique. Instead of setting a « set and forget » level, you treat the send knob or fader as a momentary trigger.
The concept is simple: you route your snare (or vocal, or guitar) to an auxiliary bus with a delay unit. For most of the track, the send level is all the way down. Then, at the perfect moment—typically on the last snare hit of a four-bar phrase—you quickly « throw » the send up and immediately back down. This sends a single, powerful transient to the delay, creating a cascading echo that fills the space and then disappears, leaving the core mix clean. This technique is visualized in the signal path below, showing how a single channel is selectively sent to an effects processor.
The character of the throw depends on your delay settings. A simple quarter-note delay creates a classic rhythmic echo. A tape delay with high feedback will spiral into self-oscillation, adding a layer of controlled chaos. By « playing » the send level and the feedback knob in real-time, you can shape the texture and length of these throws, making each one unique. This is gestural mixing at its finest—a physical, intuitive action that has a massive sonic impact, turning a simple effect into a lead instrument.
Action Plan: Mastering the Snare Delay Throw
- Routing: Send your snare drum to an aux/bus track. Place a delay plugin or route to a hardware delay unit on that track.
- Timing: Set the delay time to complement the song’s rhythm (e.g., quarter note, dotted eighth). Start with feedback at 0% for a single, clean reflection.
- Filtering: Use a low-pass filter (High Cut) on the delay return to remove the harsh « crack » of the snare, leaving only the warm body and tail for a seamless blend.
- Performance: Keep the aux send fader/knob at zero. At the desired moment, perform a quick, decisive upward flick of the send and immediately pull it back down.
- Experimentation: « Play » the feedback control. Increase it during the throw to create rhythmic, polyrhythmic patterns or push it to the edge of oscillation for dub-style chaos.
Digital Summing or Analog Desk: Which One Provides Better Separation?
The debate between digital summing (mixing « in the box ») and analog summing on a console is one of the most persistent in audio engineering. While digital summing is mathematically perfect, many experienced engineers argue that this perfection is precisely its flaw. Analog summing, where individual channels are electrically combined, introduces subtle nonlinearities, crosstalk, and harmonic distortion. Far from being a problem, these « imperfections » are what create the coveted sense of width, depth, and separation that defines classic records.
When multiple signals are combined in an analog circuit, they interact in a way that digital algorithms struggle to replicate. Each channel has its own electronic path, and the slight variations create a more spacious and three-dimensional soundstage. It’s not just about left-right panning; it’s about front-to-back depth. A blind listening test and shootout confirmed this, finding a Dangerous analog summing mixer demonstrated measurably more width and transient separation compared to its digital counterpart. This isn’t just audiophile fantasy; it’s a tangible difference in how the elements of a mix relate to each other.
This effect is often described as instruments having their « own space » in the mix without sounding disconnected. Famed mixer Ryan West, writing for Tape Op Magazine, captured this feeling perfectly when comparing the two methods on the same mix:
The analog summed mix is wider, deeper, more musical, more spacious… Especially apparent to my ears is the detail in the effects, the delays and reverbs. They seemed more audible in general, but also more spacious.
– Ryan West, Tape Op Magazine
For a performance-based mixer, this added dimension is crucial. The separation provided by analog summing means that your fader movements and effect throws have more room to breathe. The sonic alchemy of the analog console helps to glue the mix together in a musical way, making the entire soundstage feel more cohesive and alive, even before you start performing your fader rides and mutes.
The Red-Lining Mistake That Introduces Ugly Digital Distortion
In the analog world, pushing levels into the « red » was often a creative choice. Driving a console or tape machine hard introduced warm, pleasing saturation and compression that could add punch and character to drums and bass. Many mixers new to the digital domain make the mistake of applying this same philosophy, but the result is disastrous. Digital red-lining, or « clipping, » is not the same as analog saturation. It’s a brick wall that creates harsh, unpleasant, and unmusical distortion.
Digital audio has an absolute ceiling at 0 dBFS (decibels Full Scale). Any signal that tries to exceed this level is simply chopped off. This abrupt truncation of the waveform produces a flurry of inharmonic overtones that sound like a nasty, fizzy crackle. It lacks the musicality of analog saturation, which gradually rounds off the peaks and adds harmonically related overtones. To avoid this, proper gain staging is essential. For optimal results, proper gain staging guidelines recommend aiming for average -18dB levels with peaks no higher than -10dB. This leaves plenty of headroom for the mix to breathe and prevents any accidental digital clipping.
However, this doesn’t mean you have to abandon the creative use of overload. The key is to control it. A technical analysis of the phenomenon shows that the « staged overload » technique can be a powerful tool. Instead of letting your master bus clip, you can use analog-style clipping plugins on individual tracks or parallel buses. This allows you to introduce controllable, musical saturation as a creative effect. You can push a parallel drum bus into a clipper to add aggression and then blend it back in with the main drum sound. In a live mix performance, you can automate the send to this « overload bus, » using it as another form of rhythmic punctuation to add explosive energy to specific moments without destroying the integrity of your entire mix.
How to Route External Gear into the Desk for a Hybrid Workflow?
A hybrid workflow, combining the flexibility of a DAW with the sonic character of an analog desk and outboard gear, offers the best of both worlds. But the real creative potential is unlocked when you stop thinking of external gear as simple « inserts » and start treating them as playable instruments. The routing itself becomes part of the performance. A powerful way to achieve this is through a technique that treats a single sound source as having multiple personalities.
Instead of a standard routing, this creative approach involves sending a single mono source from your DAW—like a lead vocal or a synth line—out to two completely separate channels on your analog console. Each channel is then processed with a radically different effects chain. This is where the sonic alchemy truly begins. For example, you could set up:
- Channel A (The « Clean » Personality): Routed through a classic optical compressor and a high-quality plate reverb. This is the solid, foundational sound.
- Channel B (The « Wild » Personality): Sent through a gritty fuzz pedal, a sweeping phaser, and a long, oscillating tape delay. This is the chaotic, unpredictable alter-ego.
Case Study: The « Split Personality » Channel Routing Technique
A hybrid workflow case study from Produce Like A Pro demonstrates this exact method. By routing a single vocal take to two console channels with drastically different analog effects, the mix performance becomes an interactive cross-fade. The engineer uses the faders and mutes to blend between the « clean » and « distorted » personalities in real-time. A verse might be mostly the clean channel, but for the last word of a line, the distorted channel is quickly faded in and muted, creating a ghostly, effected tail. During a chaotic bridge, the two faders can be « played » against each other, creating a dynamic, evolving texture that would be impossible to program with automation alone.
This technique transforms the mixing desk into a true performance instrument. Your faders and mutes are no longer just for level control; they are for morphing the very character of a sound in time with the music. It’s a prime example of gestural mixing, where the physical act of cross-fading and muting is integral to the creative outcome.
How to Stack Three-Part Harmonies That Blend Perfectly in the Mix?
Stacked vocal harmonies are the bedrock of countless classic rock and pop tracks. Getting them to blend perfectly while remaining clear and impactful is an art form. While static panning and leveling can work, a performance-based approach can make them truly come alive. Instead of thinking of the harmony stack as a single block of sound, treat it as a living entity that can change shape and texture throughout the song. This requires moving beyond static settings and « performing » the harmonies on the desk.
The first step is to group all your harmony vocals to a single stereo sub-group. This fader now controls the entire harmony stack’s presence in the mix. But the real magic comes from multiple automation passes, each with a specific performance goal. This isn’t tedious, point-and-click automation; it’s about recording your own real-time fader and knob movements in passes, like a musician overdubbing parts. This process allows you to shape the console’s breath, making the harmonies feel like they are interacting with the lead vocal and the song’s emotional arc.
A multi-pass performance approach might look like this:
- Overall Dynamic Pass: On the first pass, ride the sub-group fader to subtly swell the entire harmony stack into and out of phrases. Make them bloom at the end of a line and tuck them tightly behind the lead during denser passages.
- Spotlight Pass: On a second pass, focus on one specific harmony voice. Momentarily push its fader up slightly to « spotlight » it, leading the listener’s ear, before letting it recede back into the blend.
- Width Pass: Route each harmony to its own channel and perform pan pot movements. Keep them relatively narrow and centered in the verses, then explode them wide in the choruses for maximum impact.
- Texture Pass: Use multiple aux sends on the harmony subgroup (e.g., a short, tight reverb on one, a long, washed-out delay on another). « Play » the send and return levels in real-time to change the texture and depth of the harmonies, matching the song’s journey from intimate to epic.
This method turns harmony mixing from a balancing act into a dynamic performance. Each pass adds a new layer of movement and life, ensuring the harmonies are not just supporting the lead vocal, but are an integral, breathing part of the arrangement.
How to Create Controlled Feedback Loops Using a Mixer and Pedals?
Feedback is often seen as the enemy of the audio engineer—a high-pitched squeal to be eliminated at all costs. But for the performance mixer, especially in the realms of dub, noise rock, and experimental music, feedback is a powerful raw material. When controlled, it can be tamed and « played » like a synthesizer, creating evolving drones, shrieking textures, and a thrilling sense of tension. The mixing desk is the perfect command center for this kind of sonic exploration.
The basic principle of a feedback loop is simple: you send the output of a device back into its own input. Using a mixer, this is done by routing a channel’s output (via an aux send) to an external effects pedal, and then bringing the output of that pedal back into another channel on the desk. If you then turn up the aux send on the pedal’s return channel, you complete the loop. The signal will begin to feed on itself, quickly escalating into oscillation.
The art is in controlling this chaos. One of the most musical ways to do this is to « tune » the feedback. By inserting a parametric or graphic EQ into the feedback loop, you can surgically boost specific frequencies. This tells the loop which frequency to favor as it oscillates, effectively turning the feedback from pure noise into a playable, pitched drone that can be tuned to the key of the song.
Case Study: The « Edge of Oscillation » Ride
A creative feedback technique focuses on the performance aspect of riding the aux send fader. An engineer can find the precise point where feedback just begins to emerge—the « edge of oscillation. » By riding the fader at this critical threshold, you can create an incredible sense of tension and instability. Pushing it slightly over the edge causes the feedback to bloom, while pulling it back tames the beast. This technique allows the feedback to be « played » like a soloist building to a crescendo, adding a layer of unpredictable, exhilarating energy that is impossible to replicate with a software instrument. The performance is all about managing that delicate balance between silence and chaos.
This approach redefines feedback as an instrument. The mixer is no longer just a passive router of signals; it is an active participant in generating new, unique sounds from the system itself. It’s the ultimate expression of the console as a generative, playable machine.
Key takeaways
- Manual fader riding injects human emotion and dynamics that static compression cannot match.
- Treating mutes and effect sends as momentary, percussive triggers transforms mixing into a live performance.
- Analog summing and saturation provide superior width and cohesion, creating a powerful foundation that feels loud without being crushed.
How to Mix Modern Hard Rock to Compete With Pop on Spotify Playlists?
In the modern streaming era, hard rock mixes face a unique challenge: they need to be loud and powerful enough to stand up next to hyper-compressed pop and electronic tracks on playlists, but without sacrificing the dynamics and punch that are essential to the genre. Simply slapping a limiter on the master bus often results in a « squashed, » lifeless mix that loses all its impact. The secret lies in building loudness and density from the ground up, using a performance-based strategy that leverages both compression and saturation.
A highly effective method is the « Power Bus » performance mixing strategy. This involves creating a parallel bus specifically for the core power elements of your track: drums, bass, and rhythm guitars. This bus is treated with aggressive compression and saturation, designed to add density, sustain, and character, not just control dynamics. According to the Sweetwater engineering team, the natural saturation from a console or analog-style processor allows a mix to achieve high RMS levels that feel powerful and cohesive, rather than just loud.
The « performance » aspect comes from how you use this Power Bus. The return fader for this bus becomes a primary performance control. Instead of leaving it at a static level, you « play » it throughout the song:
- During the verses, keep the Power Bus fader low or even muted. This allows the natural dynamics of the performance to shine through, creating space and anticipation.
- As the track builds into the chorus or a heavy riff, push the Power Bus fader up aggressively. This injects a massive shot of density and energy, making the section explode without you having to touch the master fader.
This human-driven automation creates an ebb and flow of energy that is far more exciting and musical than what can be achieved with a final limiter alone. It allows you to compete on loudness while retaining the visceral punch and dynamic contrast that defines great rock music. The mix gets loud because you are *performing* it to be loud at the right moments.
Stop correcting and start performing. Turn off the screen, put your hands on the faders, and listen. The goal is not to fix the recording, but to join it. Let the console become an extension of your musical intuition and transform your static mix into a living, breathing performance.