The common « low-gain into high-gain » rule is a misleading oversimplification; true tonal mastery comes from understanding the electrical interactions between pedals.
- Stacking is a science of managing cumulative gain, impedance matching, and harmonic content, not a random art.
- The second pedal in a drive chain often dictates the final EQ character, while the first acts as a filter and booster.
Recommendation: Stop experimenting blindly. Start by analyzing each pedal’s function (boost, EQ, primary distortion) and build your chain with deliberate electronic purpose.
For any guitarist, the quest for the perfect lead tone is a journey paved with pedals. You’ve spent a small fortune on boutique overdrives, classic distortions, and holy-grail fuzzes. Yet, when you chain them together, the glorious, soaring sound in your head often becomes a compressed, fizzy, and undefined mess. The common advice— »just put the low gain before the high gain »—is a starting point, but it fails to explain the sonic chaos that can still erupt from your amp.
The frustration is real. You’ve followed the « rules, » but your tone still lacks clarity in fast riffs, disappears in a live mix, or reacts unpredictably to your guitar’s volume knob. This is because great tone isn’t born from rules of thumb; it’s engineered. The secret lies not in the pedals themselves, but in the electrical realities of how they interact within the signal path. What if the key wasn’t just *what* you stack, but a deep understanding of *why* you’re stacking it that way?
This guide moves beyond guitar-forum folklore and into the realm of electrical engineering. We will dissect the signal chain to reveal the scientific principles of gain staging, impedance, harmonics, and equalization. By treating your pedalboard like an engineer’s workbench, you can stop guessing and start designing a truly massive, articulate, and reliable lead tone.
To navigate this complex topic, we’ve broken down the core engineering concepts that govern pedal stacking. This structured approach will provide the technical knowledge needed to build your tone with precision and confidence.
Summary: Stacking Overdrive and Distortion for a Huge Tone
- Why Tube Amp Saturation Feels Different to Play Than Digital Distortion?
- How to Use a Noise Gate Without Killing Your Sustain and Dynamics?
- High Output or Low Output Pickups: Which Cleans Up Better With the Volume Knob?
- The EQ Mistake That Makes Your Guitar Disappear in the Live Mix
- Where to Place a Fuzz Face in the Chain to Avoid Impedance Issues?
- The Gain Knob Error That Ruins Note Definition in Fast Riffs
- How to Order Phaser, Delay, and Reverb Pedals for Maximum Space?
- How to Build a DIY Echo Chamber to Replicate the Sound of the 60s?
Why Tube Amp Saturation Feels Different to Play Than Digital Distortion?
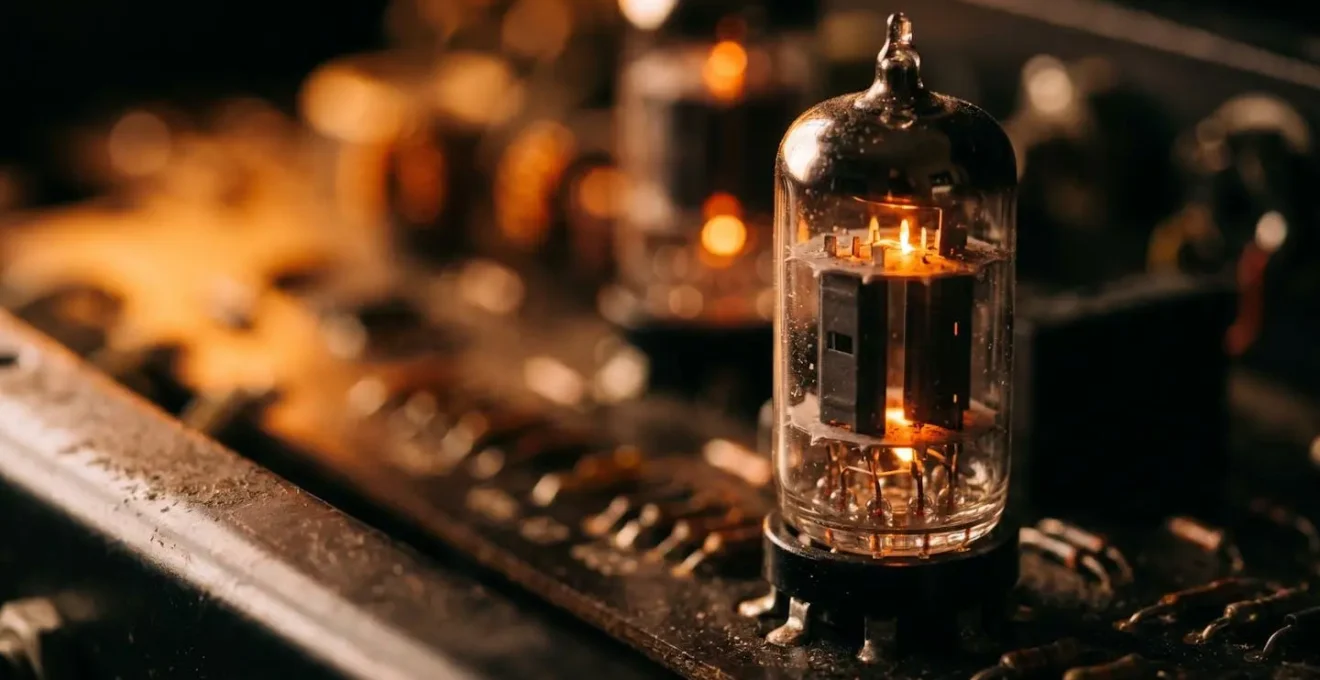
The difference between tube saturation and digital distortion isn’t just about sound; it’s about feel and harmonic structure. When a vacuum tube is pushed into clipping, it doesn’t just distort the signal; it enriches it in a musically pleasing way. The core of this phenomenon lies in the type of harmonics generated. From an engineering perspective, the magic is in the physics of thermionic emission. The warm glow is a visual cue for a complex electrical process.
This process is defined by its harmonic content. According to analysis by professional audio engineers, vacuum tubes primarily generate even-order harmonics (2nd, 4th, 6th). These harmonics are octaves and perfect fifths of the fundamental note, meaning they reinforce the original signal and add a sense of warmth and fullness. In contrast, most digital clipping and solid-state transistor circuits produce a majority of odd-order harmonics (3rd, 5th, 7th), which can sound dissonant or « harsh » to our ears. This is the harmonic content difference that defines the character of the distortion.
Furthermore, tube amps exhibit natural compression, often called « sag, » when pushed hard. This is a drop in voltage in the power supply that softens the initial attack of a note and increases sustain, creating a dynamic response that feels « spongy » and interactive under the fingers. A digital algorithm can model the sound of clipping, but replicating this complex, non-linear interplay of harmonics, compression, and dynamic response is the true challenge. Understanding this helps in choosing stacking partners: you might use a digital pedal for its precise EQ shaping and a tube amp for its rich harmonic foundation.
How to Use a Noise Gate Without Killing Your Sustain and Dynamics?
In a high-gain signal chain, a noise gate seems like a necessary evil. Stacking multiple gain pedals exponentially increases the noise floor, resulting in an unacceptable level of hiss and hum. The problem is that a simple gate placed at the end of your chain can’t distinguish between unwanted noise and the beautiful, sustaining tail of a note. It hears only signal level, so as your note decays, the gate abruptly clamps down, killing your sustain. This is a classic signal-to-noise ratio problem that requires a more intelligent solution than simple placement.
The engineering solution is to give the gate more information. A gate needs to know what your « clean » guitar signal is before it gets buried in amp and pedal distortion. This is achieved with the four-cable method, which uses the effects loop of both the gate pedal and your amplifier. By routing the signal this way, the gate’s detection circuit can monitor your clean guitar signal directly, while its gating circuit is placed after the noisy preamp section of your amp. This allows it to open only when you are actually playing and close silently when you stop, preserving every ounce of your natural sustain and playing dynamics.
This method effectively separates the « key » signal (your clean guitar) from the signal that needs to be gated (the noisy, high-gain signal). It’s the most effective way to clean up a rig without compromising its musicality. It turns the noise gate from a tone-killing hatchet into a precision surgical tool.
Action Plan: Implementing the Four-Cable Method
- Run your guitar directly into the input of the noise gate pedal.
- Connect the noise gate’s SEND to your amplifier’s main input.
- Connect your amplifier’s effects loop SEND to the noise gate’s RETURN.
- Connect the noise gate’s OUTPUT to your amplifier’s effects loop RETURN.
High Output or Low Output Pickups: Which Cleans Up Better With the Volume Knob?
A guitarist’s ability to « clean up » a distorted tone by rolling back the guitar’s volume knob is a hallmark of dynamic playing. Many assume a high-output pickup would be worse at this, but the reason lies in electrical principles, specifically inductance and its effect on the pickup’s resonant frequency. It’s not about output level alone; it’s about how the pickup’s electrical properties interact with the simple potentiometer that is your volume control.
High-output pickups achieve their power by having many more turns of copper wire. This increased winding dramatically increases their inductance. When you roll back the volume knob, you’re adding resistance to the circuit, which, when combined with high inductance, creates a low-pass filter that shifts the pickup’s resonant peak. This often results in a « muddy » or « dull » sound, as the high-frequency sparkle is lost disproportionately. Your tone doesn’t just get quieter; its entire EQ character changes for the worse.
In contrast, low-output pickups, with their lower inductance, are less susceptible to this effect. An analysis of pickup behavior shows low-output pickups maintain a flatter frequency response as the volume is reduced. The tone gets quieter, but its fundamental character and high-end clarity remain largely intact. This gives the player a much wider and more predictable dynamic range from a single channel on their amp. For a player who relies on the volume knob as an expressive tool, a low-output pickup is almost always the superior engineering choice, providing greater control and responsiveness.
The EQ Mistake That Makes Your Guitar Disappear in the Live Mix
In the bedroom, a « scooped mid » tone can sound immense. You dial down the mids on your amp or EQ pedal, boost the bass and treble, and create a thunderous, larger-than-life sound. However, the moment you step onto a stage with a full band, your guitar vanishes. This isn’t a problem with volume; it’s a fundamental error in understanding psychoacoustics and frequency allocation within a mix. You’ve just EQ’d your guitar into direct competition with the two instruments that own the frequency extremes: the bass guitar and the cymbals.
A live mix is a battle for sonic space. The bass guitar and kick drum dominate the low frequencies (below 200Hz), while the cymbals, hi-hats, and vocal sibilance occupy the high frequencies (above 5kHz). The guitar’s home, its voice, is in the midrange. It’s the one place where it can assert its identity without being masked. As audio frequency research confirms, the midrange area between 800Hz and 2.5kHz is especially critical, as this is where human hearing is most sensitive and where the essential character and attack of a distorted guitar lives.
By scooping your mids, you are voluntarily abdicating your sonic territory. You are creating a « hole » in the mix right where your guitar should be sitting. The solution is to do the opposite of what feels intuitive in isolation: boost the mids. A prominent midrange ensures your guitar has the power to cut through the densest rhythm section, allowing every note and riff to be heard with clarity and authority. A great live tone isn’t about sounding huge by yourself; it’s about sounding distinct within the collective.
Where to Place a Fuzz Face in the Chain to Avoid Impedance Issues?
The vintage Fuzz Face and its many derivatives are legendary for their sound but notorious for their pickiness. A guitarist will often find that their beloved fuzz sounds fantastic plugged directly into an amp, but becomes thin, harsh, and sterile when placed on a pedalboard. This is not a matter of taste; it is a classic case of impedance mismatch, a fundamental electrical conflict between the fuzz pedal’s archaic design and modern buffered-bypass pedals.
The key to understanding this is knowing that the Fuzz Face circuit was designed in an era before pedalboards. It was intended to be the first and only thing connected to the guitar. Its circuit has a very low input impedance, meaning it wants to draw a significant amount of signal from the source. Your guitar’s passive pickups have a high output impedance, and the interaction between these two mismatched values is what creates the Fuzz Face’s magic. It’s this electrical « loading » of the pickups that allows the circuit to react so dynamically to your guitar’s volume knob, cleaning up from a raging fuzz to a near-clean sparkle.
Any pedal with a buffer placed before the Fuzz Face destroys this delicate relationship. A buffer is a circuit designed to convert the high-impedance signal from your guitar to a low-impedance signal that can drive long cables and other pedals without tone loss. When the Fuzz Face « sees » this low-impedance signal, the crucial interaction is lost. The solution is simple and absolute: the Fuzz Face must be the first pedal in your signal chain, connected directly to your guitar. As confirmed by experts in signal path analysis:
The vintage Fuzz Face circuit has a very low input impedance. It needs to ‘see’ the high-impedance signal directly from your guitar pickups. Any buffered pedal placed before it will lower the impedance, making the fuzz sound thin, sterile, and lose its ability to ‘clean up’ with the guitar’s volume knob.
– Guitar Signal Chain Analysis, Fuzz Face Circuit Impedance Requirements
The Gain Knob Error That Ruins Note Definition in Fast Riffs
When crafting a heavy tone, the instinct is often to crank the gain knob. More gain equals more power, right? This is a common misconception that leads to one of the biggest problems in high-gain tone: a lack of note definition. When you push a single distortion pedal or amp channel to its maximum gain setting, you’re not just adding saturation; you’re adding immense amounts of compression. This over-compression squashes the dynamic range, blurring the attack of each individual note into a wash of noise. For fast, articulate riffs, this is sonic death.
The professional solution is to think in terms of gain staging. Instead of getting all your distortion from one source, you use multiple, lower-gain sources in series. Each stage adds a bit of gain and its own EQ character, building a complex, rich tone without the excessive compression of a single maxed-out stage. It’s about achieving the *perception* of high gain while maintaining the clarity of a lower-gain setup. When you stack pedals, the second pedal in the chain dictates the overall tone, while the first pedal acts as a tone-shaping boost.
A classic example of professional gain staging for metal is using a Tube Screamer-style pedal into an already distorted amp. The key is how the pedal is set:
- Identify all gain stages in your signal chain (e.g., pickup output, boost pedal, overdrive, amp preamp).
- Avoid maxing out each individual stage, which results in over-compression and loss of definition.
- Set the Tube Screamer with the Gain at or near zero, and the Level at or near maximum.
- This pushes the front end of the amp harder (more level) while tightening the low-end and boosting the mids (the Tube Screamer’s inherent EQ) *before* the amp’s primary distortion stage.
This technique doesn’t add more fuzz, it adds clarity and aggression. The result is a tighter, more defined, and more articulate high-gain tone that allows every note in a fast riff to be heard clearly.
How to Order Phaser, Delay, and Reverb Pedals for Maximum Space?
Once your core drive tones are established, creating a sense of space with modulation and time-based effects is the next frontier. The order in which you place your phaser, delay, and reverb pedals has a profound impact on the final texture of your sound. There is no single « correct » order, but different routing philosophies produce distinctly different sonic outcomes, each suited for different musical styles. The choice depends on whether you want to add an effect to your sound, or create a sound that *is* the effect.
The most common debate is whether to place these effects before the amplifier’s input or within its effects loop (if available). Placing time-based effects *before* a distorted preamp means you are distorting the echoes and reverberations, which can lead to a messy, washed-out sound. Placing them in the effects loop (after the preamp) keeps the repeats and reverb tails clean and clear, resulting in a more modern, studio-like clarity. The same logic applies to the internal order of the pedals themselves: do you want to have echoes of a phased sound, or do you want to phase the echoes?
The following table outlines the most common routing philosophies and their sonic characteristics, providing a clear framework for experimentation. Understanding these paths allows you to move from random placement to intentional textural design.
| Routing Method | Signal Path | Sonic Character | Best For |
|---|---|---|---|
| Vintage (Pre-FX Loop) | Phaser → Delay → Reverb into amp front | Washed-out, blended, organic sound | Classic rock, vintage tones |
| Modern (Effects Loop) | Phaser → Delay → Reverb in amp FX loop | Maximum clarity, studio-like separation | Modern rock, precise mixes |
| Shoegaze Secret | Reverb → Delay (reversed order) | Huge cascading soundscapes, delay repeats entire reverb space | Ambient, shoegaze, experimental |
Key Takeaways
- Tone is sculpted by managing cumulative gain stages, not by a single pedal’s gain knob. Clarity comes from multiple, moderate gain sources working together.
- Impedance is not optional; it is a fundamental electrical law that dictates how pedals interact. A mismatch can kill your tone before it even begins.
- The guitar’s voice lives in the midrange (800Hz-2.5kHz). Scooping the mids is the fastest way to make your guitar disappear in a live band setting.
How to Build a DIY Echo Chamber to Replicate the Sound of the 60s?
After mastering the electronic intricacies of your pedalboard, the ultimate geeky pursuit is to recreate the original, physical form of ambient effects: the echo chamber. In the pre-digital 1960s, iconic reverb and echo sounds from studios like Sun or Capitol were not generated by pedals or plugins, but by playing a sound through a speaker in a highly reverberant room (like a tiled bathroom or concrete stairwell) and capturing the result with a microphone. This process imparts a sound with a unique spatial character that is impossible to perfectly replicate digitally.
The beauty of this technique is its organic complexity. The sound captured by the microphone isn’t just a simple echo; it’s a dense web of early reflections, flutter echoes, and the unique EQ signature of the room itself. Every room sounds different, so every DIY echo chamber has a one-of-a-kind sonic fingerprint. Building your own is a surprisingly low-budget affair that connects you to the foundational techniques of audio engineering.
It provides a tangible way to understand how physical space shapes sound, moving beyond presets and into the world of pure acoustic science. The process is a simple but elegant application of signal routing in the physical world:
- Gather Materials: You need a small speaker (an old radio or computer speaker works), a microphone (an SM57 is classic, but any will do), and a hard-surfaced, reverberant space like a bathroom, garage, or stairwell.
- Position Equipment: Place the speaker and microphone in the room. Experiment with positioning to change the character of the reflections.
- Send Signal: Route a « dry » signal from your audio interface or mixer’s auxiliary send to the speaker in the chamber.
- Capture Ambience: Route the signal from the microphone in the chamber back to a new input channel on your interface or mixer.
- Mix to Taste: Blend this « wet » signal from the echo chamber with your original « dry » signal to control the amount of reverb.
By taking your signal out of the box and into a real room, you are adding a layer of acoustic reality and vintage authenticity that no pedal can perfectly emulate. It is the final step from simply using effects to truly engineering sound.
Now, armed with the engineering principles of gain staging, impedance matching, and frequency management, you can approach your pedalboard not as a collection of random boxes, but as a modular system for sonic design. Start experimenting, but this time with purpose, listening for the electrical interactions and building your massive lead tone one deliberate, informed step at a time.